Looking for a side hustle and wondering how to make money translating? Professional translator here! In this blog post, I will teach you how to translate for money and create a new income stream even with a full-time job.
PIN THIS POST TO READ IT LATER ⬇

DISCLOSURE
Some of the links on here are affiliate links, and I may earn a small commission if you click on them, AT NO EXTRA cost to you. I am not responsible for any incorrect information displayed here and you are the sole responsible for your financial success.
- How To Make Money Translating: The ULTIMATE Guide
- What Is The Job Of A Translator?
- How To Make Money Translating
- Join Freelance Platforms
- Earn Translation Royalties
- Cold E-mail Potential Clients
- Promote Yourself On Social Media
- Join Professional Association Directories
- Apply For Remote Work On Traditional Job Boards
How To Make Money Translating: The ULTIMATE Guide
Okay! Grab your favourite beverage and some snacks and let’s get into this mega guide.
Before diving into the different ways of making money translating, we have to understand what the job of a translator is.
What Is The Job Of A Translator?
Translators are trained professionals who specialize in converting written texts from one language to another accurately, maintaining the meaning of the source text, and taking into account the grammatical and orthographical rules of the target language.
The process of translation can be divided into 3 basic stages:
RESEARCH + TRANSLATION + PROOFREADING/EDITING
During the process of translation, translators do research not only to understand concepts and terms of the original document but also to solve translation problems such as the lack of equivalents in the target language.
Making use of advanced writing skills and translation techniques is key to ensuring the target text reads naturally and resembles the style of the original document.
After translating the text, translators proofread their documents multiple times and edit them to achieve error-free deliverables.

How To Make Money Translating
You consider that you have all that it takes to start your career as an online translator, but…Where to start?
Here are 6 ways to start making money translating:
- Join freelance platforms
- Earn translation royalties
- Cold e-mail potential clients
- Join professional association directories
- Apply for remote work on traditional job boards
Join Freelance Platforms
Well, the best way to start gaining experience and testimonials is to set up your profile on freelance platforms and start working on projects awarded to you.
The work methodology on these platforms is pretty much the same:
- Browse projects that match your skills
- Submit your proposals
- Get interviewed by the clients to set expectations
- Get hired
- Submit your work for review and acceptance
- Get paid
- Exchange reviews
- Repeat
RELATED POSTS:
- Hack: How to Translate Faster to Make More Money From Home
- 45 Killer Business Ideas for Stay At Home Moms No One Talks About
What Are Trusted Websites To Make Money Translating?
These are my favorite freelance platforms to work as a freelance translator:
- Upwork
- Fiverr
- Freelancer
- ProZ
Upwork
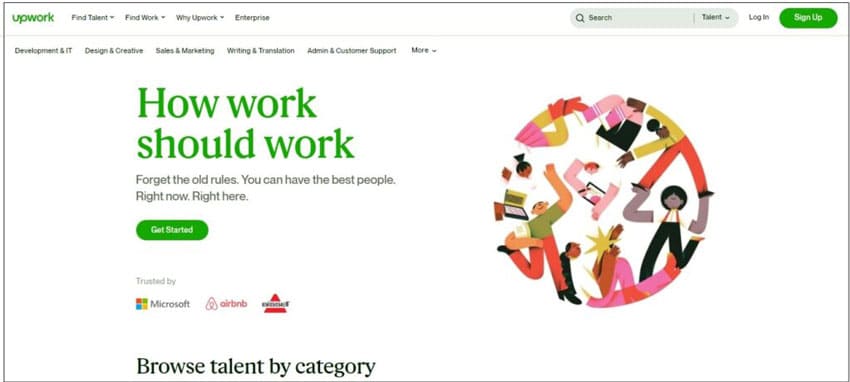
Upwork is the largest freelance marketplace in the world.
Here, you can either bid on projects or list your services for clients to buy.
However, you can also be recruited by Upwork’s Talent Scout after working on the platform for a while.
Profile Creation
Start by creating your profile. Import the content from your LinkedIn account/your resume or instead complete the profile manually.
For starters, add a profile picture of yourself with a simple background and natural lighting.
Then, craft a title and a description that stand out from the crowd: remember that this is how you will present yourself to clients, so you’d better make an excellent first impression!
The title should be simple and clear, such as ‘French to English Translator’.
As for the profile ‘overview’, highlight your certifications, main skills, work experience, and the tools you’re proficient in using, but, above all, describe how you can help clients achieve their goals.
The other sections to complete are the Work Experience, Education, Languages, Services, and Skills sections.
Skill tags are key because Upwork’s algorithm will recommend job posts according to the skills listed in this section.
While you are creating your profile, Upwork will ask you to specify your hourly rate.
Note that you will be able to work on fixed-price or hourly projects, depending on the project posted.
The ‘Project Catalog’ is a newly added feature. This consists of pre-defined gigs created by freelancers that include the scope of work, the set price, and the delivery date, among other details.
Upwork will ask you to verify your identity as an extra layer of security: this may be through a government-issued ID document and also a short video chat with an Upwork agent.
Connects
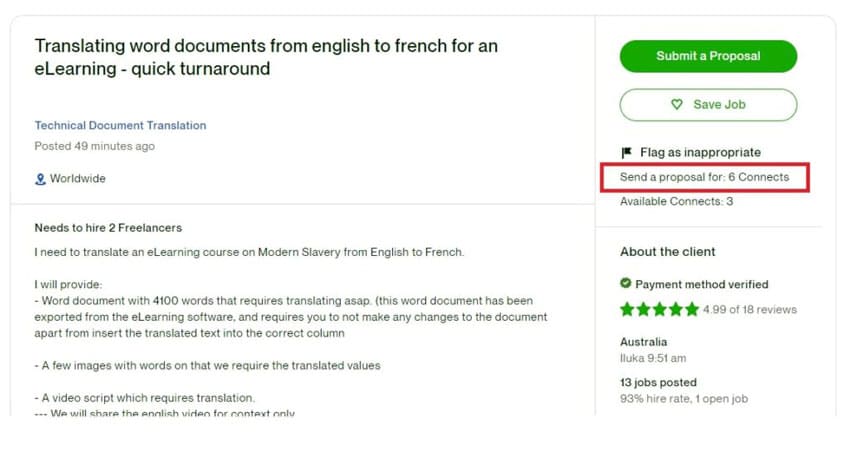
You can send your proposals by using ‘Connects’, Upwork’s virtual currency. There are different ways to get Connects:
👉 The ‘Freelancer basic’ plan (free membership) includes 10 free connects. The ‘Freelancer Plus’ paid plan ($14.99 per month) includes 80 free Connects per month.
👉 You can buy Connects ($0.15 each) in bundles of 10, 20, 40, 60, and 80. You’ll run out of Connects fast when sending proposals, so buying Connects is inevitable. Take that into account.
👉 Occasionally, Upwork rewards freelancers with free Connects: for example, when you register for Upwork for the first time (40 Connects), when you earn a ‘Rising Talent Badge’ (30 Connects), when you win an interview with an established client on Upwork (the number varies), and when you complete an Upwork Skill Certification (one-time Connects bonus).
You can boost your proposal by bidding with more Connects if you want. This way, you will be moved up the list of freelancers interested in the project.
Similarly, you have the option to add an ‘Availability Badge’ to your profile to show clients that you can help them right away. The price of this badge varies, but currently it costs 6 Connects per week.
No Connects are needed if a client invites you to bid or if they send you an offer, if someone purchases your Project Catalog project, or if you bid within an Enterprise Talent Cloud.
The number of Connects needed for each project varies and some jobs don’t require Connects at all.
Service Fees
What about Upwork service fees? The initial service fee is 20%, for the first $500 billed to your client. If you earn between $500.01-$10,000 from the client, the service fee is 10%, and 5% if you get $10,000.01 or more from them.
No service fees will be taken until you complete your work.
Payment Protection
No matter the type of project you decide to work on, you can count on the Payment Protection offered by Upwork.
In the case of hourly projects, you will need to log all hours worked on the Work Diary on the desktop app.
As for fixed-price projects, before any work begins, you and your client will agree on the project’s defined milestones and the client will pre-fund them through an escrow deposit.
IMPORTANT: NEVER start and deliver work if the client refuses to create and fund the agreed milestone. Working without funded milestones and communicating outside the platform (for example, via WhatsApp or Telegram) may lead to the client stealing your work and not paying you after project acceptance and delivery. Avoid scams!
After your work is reviewed and accepted by the client, the funds in escrow will be released to you.
You can withdraw your funds after a five-day security period in the case of fixed-price and Project Catalog contracts and after a 10-day security period for hourly contracts.
Withdraw your funds directly to your bank account with the following payment methods:
💵 Direct to U.S. Bank (ACH) (free),
💵 Direct to Local Bank ($0.99 per transfer),
💵 U.S. Dollar wire transfer ($30 per transfer),
💵 Instant Pay to U.S. Freelancers ($2 per transfer),
💵 PayPal,
💵 Payoneer, and
💵 M-Pesa (Kenya only).
Batches
Four Upwork Batches help you stand out:
- Rising Talent
- Top Rated
- Top Rated Plus
- Expert Vetted
These are proof of your talent, expertise, and success with Upwork clients. To qualify for these batches, read the criteria here.
Conclusion: Upwork’s Pros & Cons
PROS
✔️ Finding jobs is easy as Upwork’s algorithm recommends job posts based on your skill set.
✔️ Funds are deposited into escrow for payment protection.
✔️ No service fees will be taken until you complete your work.
✔️ You have 24 hours to cancel a project after offer acceptance, without penalties.
✔️ After getting a decent amount of testimonials, you get hired pretty quickly.
CONS
✖️ There’s a lot of competition so you’ll have to invest time and money to land your first job.
✖️ Fees are high.
✖️ Most translation projects have small budgets, although there are exceptions.
While Upwork has its flaws, it’s a wonderful platform to make money translating. At the end of the day, Connects pay for themselves. Sign up for Upwork by clicking here.
Fiverr

Fiverr is another top freelance platform in which you can make money translating.
Here, sellers (the freelancers) list their services (gigs) for buyers around the world.
The minimum payment is $5 (this gives the name to the platform), but you can charge whatever you want based on your skills and experience.
Profile Creation
Sign up with your email and start creating your seller profile.
First, upload a photo of yourself and add your field of expertise or your slogan (for example, you can write ‘EN-SP Translator | Proofreader’ or ‘Making your brand stand out in German’).
Then, edit your description: summarise what you do and your level of experience in a compelling, short paragraph.
Below this section, you can also include the languages you speak and link your social networks to add credibility to your profile.
Make sure to fill out the skill tags section to let buyers find you when they input certain keywords in the search bar.
Lastly, add your certifications and academic background and move on to the gigs section.
Gigs
Gig creation encompasses a series of steps:
▪️ Overview
▪️ Pricing
▪️ Description and FAQ
▪️ Requirements
▪️ Gallery
▪️ Publish
Overview
Your gig title should include relevant keywords to make it easy for buyers to find you.
It can be something like ‘I will translate from Russian to English and vice versa’.
Select the ‘Writing & Translation’ category as well as the ‘Translation’ subcategory.
Then, in the ‘Gig metadata’ section, you will specify the languages, the type of document, and the type of industry in which you specialize.
Don’t forget to add search tags (5 max.), which are keywords that buyers use when looking for a service.
Pricing
In the ‘Scope and Pricing’ section, you can offer packages. These will allow you to sell Basic, Standard, and Premium services.
These will differ in the number of words translated and the delivery time, which you should set in an ascendant fashion.
They also feature different services that you may include, such as proofreading, document formatting, and subtitling.
In this section, you can also add Gig Extras to boost your revenue. The typical gig extra is the Extra-Fast 1-Day Delivery, but you can create your own gig extras.
Gig Description
Here you will share the details of your gig. Be sure not to include your contact information. You want your payment to be protected, so all communication should be within the platform.
Take into account the following best practices when describing your gig:
✔️ Your gig description is a sales pitch, so keep it clear, concise, and persuasive
✔️ Describe the benefits you offer and don’t overpromise
✔️ Include keywords to target the right buyers (you can find them in Fiverr’s search bar)
✔️ Include a 100% money-back guarantee, a special discount, and a call to action such as ‘Place your order now to get a stellar German to English translation’
✔️ Highlight certain sentences and bold relevant words to catch clients’ attention
✔️ Use bullet points to make your gig description more scannable
✔️ Make sure your grammar and orthography are on point
FAQ
Then, add up to 8 commonly asked questions with their answers.
Common FAQs for translation gigs are…
❓ ‘Do you translate manually?’
❓ ‘Will my documents be safe?’
❓ ‘Do you proofread your translations?’
❓ ‘What are your qualifications?’
❓ ‘Which file format do you work with?’
Requirements
In this section, describe what you need from clients to start working on their orders.
Click on the ‘Add question’ button and specify your question.
You can get the answers in the form of free text, multiple choice, or an attachment.
Tick the box ‘Required’ if you really need the information from the client to get started.
Some common requirements deal with style and format matters. You can also make the question ‘Do you have a glossary you would like me to work with?’ to ensure accuracy and consistency with their brand’s voice.
Gallery & Publish
Next, create and upload an image for your gig.
You may have written an awesome gig description and added the correct keywords, but if your gig image sucks, no client will ever hire you!
Take the time to design an appealing, eye-catching thumbnail of at least 1280×769 px, combining text (max. 10 words), graphic elements, and a photo of yourself.
❌ Avoid pixelated images
❌ Don’t use stock photos if you don’t have the right to use them for commercial purposes
❌ Don’t use Fiverr’s logo
✔️ Keep it simple, clear, and CLICKABLE.
✔️ Make all the elements stand out from the background
✔️ Upload up to 3 images. You can showcase your work too.
When you’re done, publish the gig and share it on social media to promote your services. You’re ready to start receiving orders!
Orders
When clients place an order, they pre-fund it, and Fiverr protects your payment. Once you deliver and the order is marked as complete, you receive the funds.
Fiverr will notify you by e-mail or push notification whenever a client places an order.
To check the order details, go to the Selling menu, click on ‘Dashboard’, and access your new order.
The fact that the client paid for the gig doesn’t mean you should begin work.
Once the client shares the order requirements, Fiverr will notify you and the delivery timer will start counting backwards.
Make sure to review all that the client needs and reconfirm the delivery date just to be on the same page.
When you are ready to deliver, go to your order and send your deliverable by clicking on ‘Deliver now’. There you can attach your translation and describe the work done.
After reviewing your work, the client can mark the order as complete. But if you submit your work and the client does not respond, the order will be automatically marked as complete 3 days after delivery.
If the buyer wants modifications, you can resubmit your work by clicking on the ‘Deliver modified work’ button on the order page.
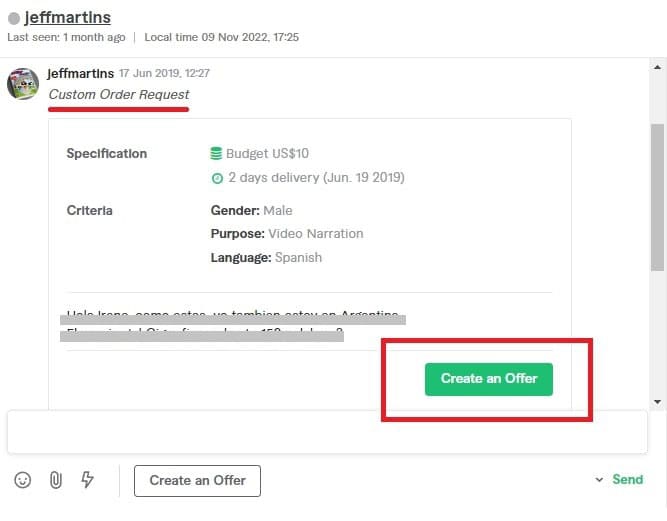
NOTE: Clients may skip choosing a gig and contact you directly to receive a custom offer if your packages don’t match exactly their needs.
You can create a custom offer by clicking on the button ‘Create an Offer’ in your inbox. Select the relevant gig, fill out the details, and send your offer.
Fees And Payment
Once the order is marked as complete, Fiverr will assign 80% of the funds to your account.
You can withdraw funds after a 14-day clearing period. Go to the Selling menu and click on Earnings > Available Funds > Withdraw Balance button, and withdraw funds through one of these options:
💵 PayPal (free)
💵 Fiverr Revenue Card ($1 within 2 days; $3 within 2 hours; not available for India and Russia)
💵 Bank Transfer ($3 per transfer)
💵 Direct Deposit ($1 per transfer; U.S. only)
Response Time Indicator And Order Completion Rate
The Response Time Indicator and Order Completion Rate directly affect your performance score, which in turn influences your gig’s position in the search rankings.
Response time Indicator
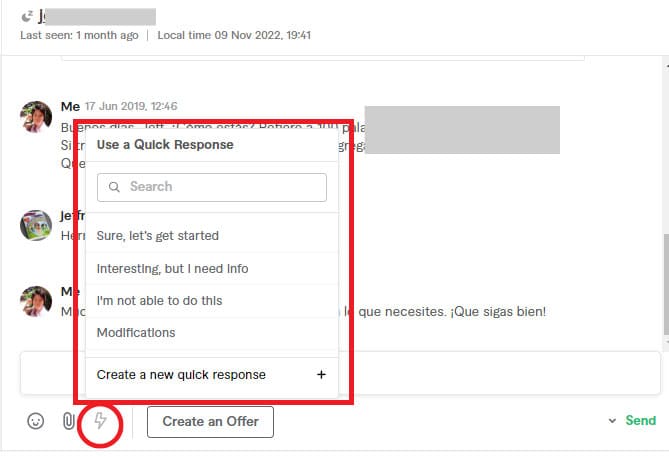
Try to respond to new messages within 24 hs. You can achieve this by downloading Fiverr’s app and using the ‘Quick Responses’ tool, which provides you with common responses to reply to your buyers much faster. You can also add your own quick responses by creating templates. See below:
Order Completion Rate
The order completion rate depends on the number of orders canceled.
Avoid getting your orders canceled by setting expectations before work, delivering on time, and reaching a mutually beneficial agreement when issues arise.
With this in mind, try to have your order completion rate at 90% to maintain your level.
Seller Level
On Fiverr, you can earn a certain rank according to your monthly performance:
🏆 New Seller
🏆 Level 1
🏆 Level 2
🏆 Top Rated Seller
These will allow you to access certain benefits and will help you get more orders. Check the requirements to reach each status here.
Fiverr’s Pros & Cons
PROS
✔️ Easy-to-use interface
✔️ Clients come to you instead of you having to send proposals to them.
✔️ Funds are deposited into escrow for payment protection.
✔️ No service fees will be taken until you complete your work.
✔️ Clients pay you what you want because you are the one setting the gig price.
✔️ After getting a decent amount of reviews, you get more traffic and orders.
CONS
✖️ Again, there’s a lot of competition so getting your first order may take time and lots of promotion efforts.
✖️ Fiverr charges a 20% fee on all earnings, no matter how much you bill your client.
✖️ You can withdraw your funds after a 14-day clearing period.
✖️ It’s difficult to change the gig’s direction once a client places an order.
✖️ Fiverr pauses your gigs if your account isn’t active (you can activate them manually though).
Despite its throwbacks, Fiverr is the best micro-job website on the market. Craft an incredible profile with click-worthy gigs, stay active on the platform, and start receiving orders to make money translating. Sign up for Fiverr by clicking here.
Freelancer
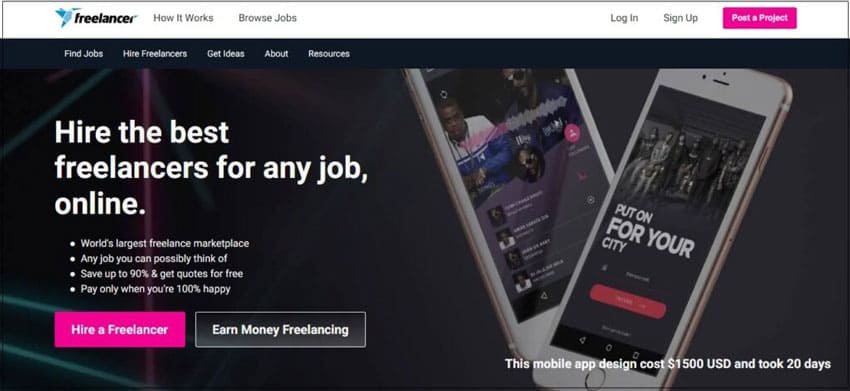
With over 50 million freelancers registered on the platform, Freelancer.com is another online job marketplace that connects employers and independent contractors from all over the world.
Here, employers post jobs and freelancers bid on these projects in a competitive tender process.
Let’s see how to make money translating on this platform below.
Profile Creation
Once you register with your mail and create a password, Freelancer.com will ask you to choose a username and account type.
Then it will redirect you to a page in which you’ll have to specify your top skills.
Select the category ‘Translation & Languages’ and then from the list on the right side choose the languages you’ll work with. Click ‘Next’.
On the following page, you can link your Facebook and LinkedIn accounts to build trust and fill out your profile faster.
Next, upload your profile picture and provide your real name and surname.
Note that, for verification purposes, you’ll have to take your profile picture with your device’s camera. You can change this picture in the future though.
In the following section, craft the title and description of your profile.
You’ll also have to specify the languages you speak, your birth data, and your address.
Finally, verify your e-mail and add a payment method to withdraw funds after completing projects.
That’s it! Freelancer.com will redirect you to your main dashboard, where job posts appear.
But, before starting bidding on projects, make sure to complete the other sections of your profile. These are the ‘Portfolio Items’, ‘Experience’, ‘Education’, and ‘Qualifications’ sections.
Having a 100% complete profile helps build trust and authority, which in turn increases your chances of getting hired.
Bidding & Membership Plans
The main way to make money translating on this platform is through projects awarded to you, although the platform also features ‘Contests’, in which clients state the job they need to be done, freelancers submit their work, and the clients review the entries and select a winner.
There are not so many translation contests on Freelancer.com, so let’s skip this feature for now.
Let’s focus on Projects.
To send your proposals, you need bids.
This is different from Upwork because all jobs require only 1 bid to send a proposal.
The number of bids available is determined by the type of membership you have.
When you register, your type of membership is Free, which offers 6 bids per month.
I recommend the Basic plan to get started, which offers 50 bids per month ($4.45/month currently).
The other plans are Plus, Professional, and Premier.
With each upgrade, the replenishment time gets faster. For example, with the Basic plan, 1 bid is replenished every 5 days, while with the Professional plan, 1 bid is replenished every 2.5 hours.
Fixed-price vs Hourly Projects
When browsing jobs, you may encounter either fixed-price or hourly projects.
In fixed-price projects, you’re paid the amount of your bid after completing the project.
Before starting work, you and the client negotiate the budget and requirements (you can modify the amount of the bid if needed).
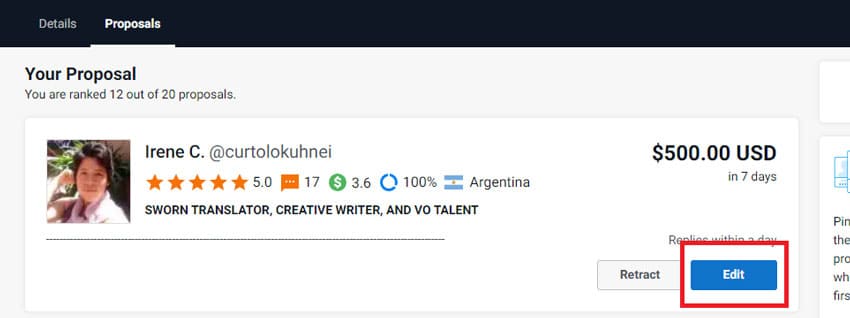
Then the client creates and funds a milestone.
Freelancer.com protects your payment until you deliver work and the client releases the milestone.
If the project is small, say with a budget of $50, the client may create only one milestone of $50.
But if you are dealing with a $2000 project, it’s better to split up the project into several milestones and partial deliveries.
When the client awards you the project, ask them to create and fund the project’s milestone before accepting the project through the button on the chatbox.
Why? Because upon project acceptance, you’ll be charged a 10% fee. Freelancer.com will collect this fee before the release of the milestone.
However, in hourly projects, where you paid your hourly rate, they collect this 10% fee after each milestone release.
For payment protection in hourly contracts, be sure to download Freelancer.com’s app and log your work hours to get paid.
Tips from the clients are also subject to a 10% service fee.
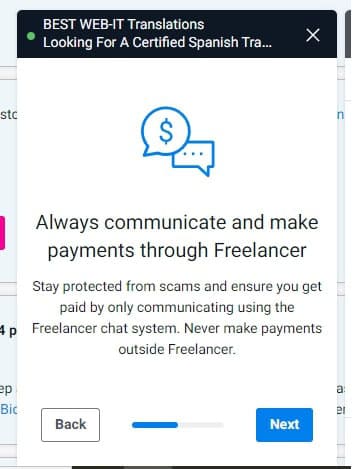
IMPORTANT: NEVER start and deliver work if the client refuses to create and fund the agreed milestone. Working without funded milestones and communicating outside the platform (for example, via WhatsApp or Telegram) may lead to the client stealing your work and not paying you after project acceptance and delivery. Avoid scams!
To withdraw your funds, go to your Dashboard > Click on your profile picture > Withdraw Funds > Select withdrawal method:
💵 Express withdrawal (directly to your local account – no fees). If you withdraw funds for the first time, it’ll take 15 days. You’ll have to verify your identity through a Know Your Customer Program. Check the requirements here. Documents for verification, such as utility bills, should be in English (you may need to translate your documents).
💵 PayPal (free)
💵 Skrill (only EUR/GBP – free)
💵 Wire transfer (minimum withdrawal amount: $500 – fees vary)
Freelancer Exams
Proof of your experience and expertise is key to getting hired on any freelancing platform.
That’s why Freelancer offers you the possibility to pass their exams and win work 25% more often.
Exam badges will display on all your bids and will help you rank higher.
I recommend going to your Dashboard > Browse > Exams and taking the relevant exams under the Translation and Languages section to boost your chances of getting hired.
Freelancer Credits & Batches
If you complete certain actions on the platform, you can earn ‘Batches’ and ‘Credits’.
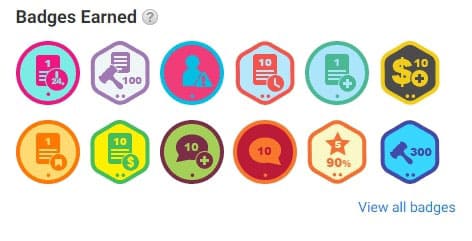
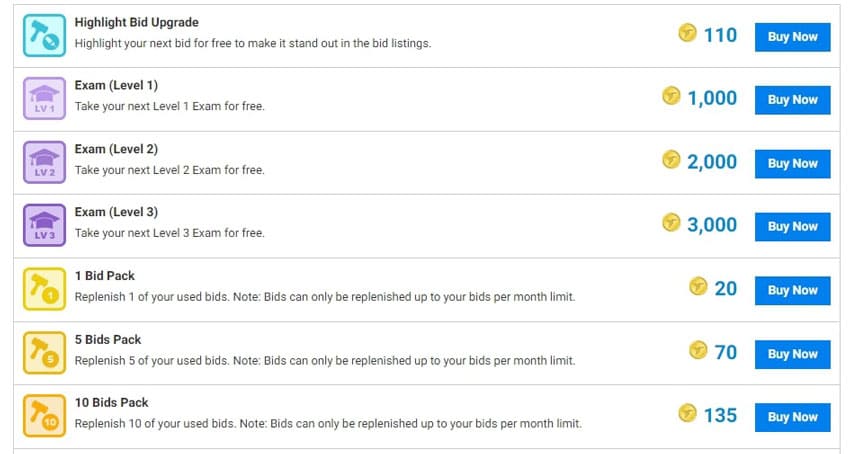
Batches highlight your achievements on the platform, such as receiving a 5-star review in 90% of your completed projects, and Credits are Freelancer’s virtual currency that you can spend on their Credit Shop to take exams for free, highlight your bids, or get bids pack to replenish your bids, for example.
Freelancer.com’s Pros & Cons
PROS
✔️ Finding jobs is easy as the Freelancer’s algorithm recommends job posts based on your skill set.
✔️ Funds are deposited into escrow for payment protection.
✔️ After getting a decent amount of testimonials, you get hired pretty quickly.
✔️ Exams batches appear on all bids for credibility and proof of your skills.
CONS
✖️ You can make money translating on Freelancer.com, but at a lower rate. Why? Because translation agencies working on Freelancer.com get almost all the translation jobs from clients posting projects on the platform. They will seek translators on the same platform, so prepare to work for agencies rather than direct clients (although there’re exceptions).
✖️ Fees are collected even before milestone release. If you accept a project and the client vanishes without creating and funding a milestone, you get charged the service fee no matter what.
✖️ According to Freelancer.com’s Terms & Conditions, they can close your account at any time without reason (taken from the Right To Refuse Service section).
Don’t let Freelancer.com’s hiccups scare you. It may seem a little intimidating at first, but, once you take your precautions, you can work at ease on this platform and make extra money on the side. Sign up for Freelancer.com by clicking here.
FUN FACT: I’ve met my husband on this platform hahah!!!! He contacted me to make a translation for a small project, but that ‘small’ project turned into a life-long project together LOL.
ProZ
ProZ.com is the world’s largest translator community.
Here, freelance translators and interpreters help each other by answering questions regarding the translation of certain terms and phrases, but they also can get found by potential clients and apply to job postings for free.
Let’s focus on how to get hired to make money translating on Proz.com.
Profile Creation
Get started by signing up on Proz.com. It’s free and you can evaluate getting into the membership later.
Go to ProZ and click on the ‘Register (free)’ button.
Create your account, skip the one-time offer to purchase a membership, and start completing your profile on the ‘Profile improvement guide’ page (you’ll be redirected to this page after creating your account).
Add as many details as possible and position your info towards potential clients, including keywords as usual.
What do the clients want from you? What are they looking for? Think of this when completing your profile to boost your chances of getting pre-selected for translation jobs.
First, add your real name, a photo, and a tagline.
When adding a tagline, think of how you can help clients. What makes you unique? Avoid saying something along the line of ‘Quality translations’ or ‘Always on time and attention to detail’. These are traits that you are expected to have from the get-go.
Now, one of the most important sections of your profile is ‘Languages’.
You won’t appear in ProZ’s directory until you complete this section.
Add your strongest language pair and tick all the services you offer for that pair.
Then, add your fields of expertise. Be sure to limit your specializations to 3, because a translator with lots of specializations is not likely to be perceived as an expert in all those areas.
Specifying your time zone and address will also help clients know about your availability and find you when searching by location.
In the ‘Years of experience’ section, state how many years/months of experience you have and tick your professional goals.
In the ‘Work’ heading of this section, tick ‘Meet new translation company clients’ and ‘Meet new end/direct clients’ and you’re good to go.
Apart from that, include your rates (minimum and standard + currency) to attract the right type of clients and filter out low-paying jobs.
Last but not least, craft a short and compelling bio for clients. You can write your bio in as many languages as you need.
Other recommended fields are the following:
▪️ Reviews: if you’ve worked with clients before, you can get feedback and show other potential clients their willingness to work with you again (WWA).
▪️ CV/Resume & Keywords
▪️ Sample Translation: you’ll have to input the source text and your translation into the table given. You’ll have to confirm that you have the client’s permission to use these texts.
▪️ Availability: go to your profile and click on ‘Edit calendar’. There you can edit your approximate availability during the week and how many words you can translate per day.
Jobs Dashboard
To start browsing jobs, go to the main menu > Jobs & Directory > Browse jobs.
Here, you will find jobs posted by agencies and direct clients alike.
If you open any of these job postings, you’ll notice there is a message at the top of the page stating if you’re eligible or not to quote according to the employer’s requirements.
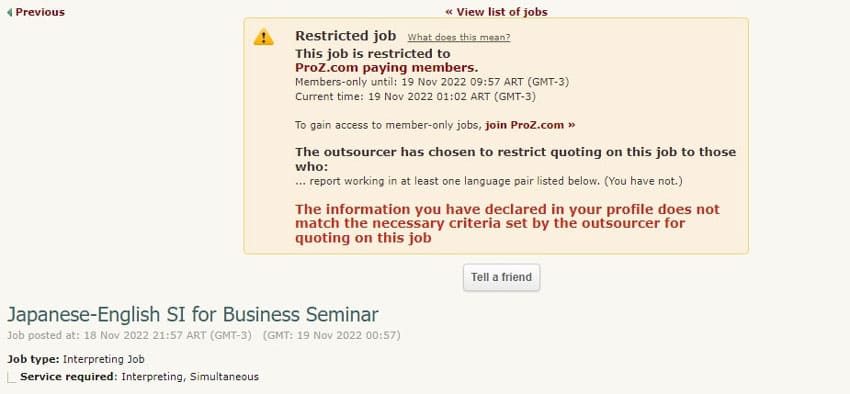
In this case, I cannot quote on this job because I do not work with that language pair, but also because I’m not a member yet.
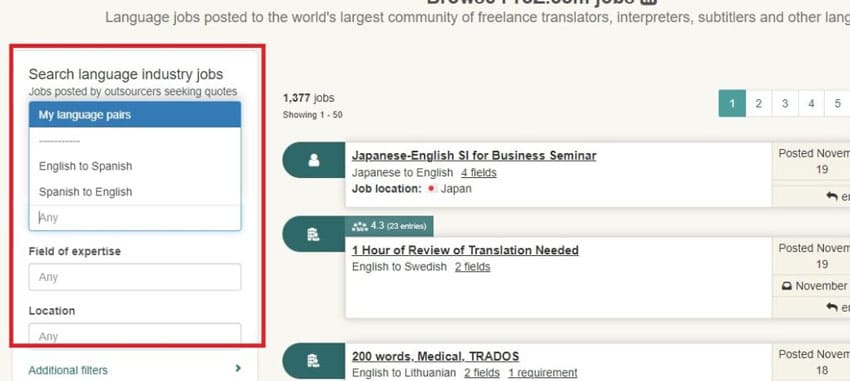
Speed things up by filtering jobs by language pairs and choosing yours on the left side of the page.
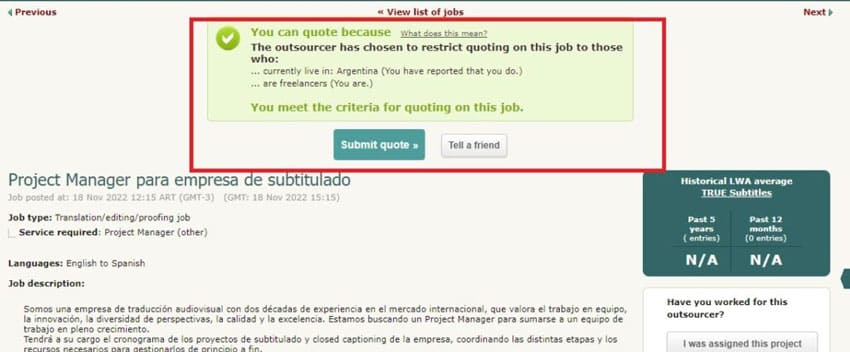
Click on ‘Submit quote’ and fill out all the fields and send your proposal.
Read the job description carefully and evaluate if it’s attractive to you.
You can always check the company’s reviews on Proz Blue Board to make your decision. The link to their Blue Board record appears in the ‘About the outsourcer’ section, below the job description.
Note that to send your proposal you’ll have to pay a $1 fee if you are not a ProZ member.
If you get hired, you’ll communicate with your client through say e-mail or WhatsApp and get paid through a payment platform like Payoneer or PayPal.
Remember that ProZ only serves as a meeting point for outsourcers and freelancers.
Paid vs Free Membership On ProZ
Should you become a member of ProZ.com? Is it worth it?
Getting a paid membership on ProZ.com has lots of benefits.
For example, members get immediate access to job posts, while free members can quote on job posts after 12 hours.
On the other hand, paid members can access outsourcers’ contact information and are paid 4 times the rate of non-members, which is a huge advantage if you’re looking to make money translating.
Other benefits include the ability to create and send invoices, appear before non-members in the directory, get discounts on translation tools, and get more traffic to your profile.
At the time of writing this post, the Standard and Plus memberships cost $120 and $180 per year respectively.
If you still don’t have the budget or simply don’t want to pay for a membership, you can always provide the best answers to translation questions on ProZ’s Kudoz Terminology Help network to earn points and rank higher in the directory.
ProZ’s Pros & Cons
PROS
✔️ ProZ does not charge any service fee because it serves only as a meeting point for outsources and translators. The payment method is negotiated out of the platform.
✔️ ProZ has a translator directory. If you have a 100% completed profile containing the right keywords, you’ll appear in ProZ’s directory and thus in Google search results.
✔️ ProZ’s Blue Board allows you to check outsourcers’ reviews to evaluate working with them before sending a quote.
✔️ ProZ allows you to filter jobs by your language pair and area of expertise to receive a list of jobs specially curated for you.
✔️ Helping other translators with their translation answers on ProZ’s Kudoz Terminology Help network helps you earn points and rank higher in the directory.
CONS
✖️ The quality and rates of jobs available are lower for free members.
✖️ You’ll have to make a big investment upfront if you decide to purchase a membership.
✖️ If you are a free member, you’ll appear below paid members in ProZ’s directory and will have to wait up to 12 hours to send a quote for some jobs.
Although ProZ may be pricey for some, appearing in its directory is a wonderful way of promoting yourself and getting hired by high-paying outsourcers. Go forward and register on ProZ.com now.
Earn Translation Royalties
To start your career as a freelance translator, you can sign up for freelance platforms, but what other ways of making money translating exist out there?
Well, if you choose to translate literary works, you receive a fee to translate books and novels, but you can also receive royalties for the sales made, an advance of royalties, or a combination of all three.

You can receive royalties by either entering into contracts with publishing houses or working through a platform like Babelcube, which matches authors and self-publishers with translators.
Of course, the amount of royalties depends on the sales volume.
You won’t become a millionaire with translation royalties, but why not give it a try?
You can check Babelcube here. This platform does not collect any service fee to translate books.
To get hired by authors to translate their books in Babelcube, you’ll have to translate a sample page plus the initial ten pages.
Then, the author reviews your work and decides whether you’re a good fit or not for the task.
You can withdraw royalties when your balance reaches a minimum of $10.
If you choose to work out of Babelcube or a similar platform, NEVER agree to be paid only with a share of the royalties, because you don’t know if the book will sell well.
Cold E-mail Potential Clients
Another way of making money translating is getting clients through cold e-mailing.
This marketing technique involves sending e-mails to prospects who you don’t have any relationship with yet.
The goal is to make the first contact with them, introduce yourself, offer your services, and describe the benefits they can obtain from working with you.
But, beware: you’ll run across thousands of cold e-mail templates on the Internet. DON’T EVER USE THEM.
Templates are not tailored to your potential clients’ needs and lack vital information that you should include to succeed at cold e-mailing.
Here are the best practices to write a killer cold e-mail:
✍️ Your e-mails have to be highly targeted so don’t send the same e-mail to hundreds of potential clients.
Take the time to do research about the client and try to figure out if they really need your services.
For example, if an agency works exclusively with the pair English-Japanese, don’t send them an e-mail if you are an English-to-German translator.
This would mean a waste of time for you and your potential client.
✍️ Address the recipient by his or her name or, at least, the name of their company or agency. Impersonal e-mails look spammy and are deleted instantly.
✍️ Put yourself in your potential client’s shoes. Why should they work with you? What benefits will they obtain from your services? Include your differentiators to stand out from the crowd.
✍️ If you have direct connections on LinkedIn with your potential client, definitely include that in your e-mail!
Referencing that or something about their education or interests draws their attention and keeps them engaged with your copy.
✍️ Identify their pain points and offer them your solution.
Your potential clients will appreciate the fact that you’ve taken the time to learn about their specific challenges and that you are trying to help them out.
✍️ Nobody wants to read a lengthy e-mail that never gets to the point. Instead, keep it short and actionable (no more than two paragraphs) and use bullet point lists.
✍️ In your subject line, include your language pair. This should be written at the beginning of your e-mail, not at the end! So the subject line is the perfect place to mention it.
✍️ Lastly, read your e-mail out load to ensure it reads naturally and is free of grammatical or orthographical errors.
In this professional field, linguistic mistakes are fatal and serve as sufficient evidence of your lack of attention and expertise.
Promote Yourself On Social Media
Building and promoting your personal brand on social media can boost your sales and improve your market presence.
Instagram, LinkedIn, Twitter…These are the go-to social media for translators who aim at attracting more clients and winning more translation jobs to make money translating.

When starting out, you won’t see any results…That is normal! Don’t get discouraged if you don’t see much activity on your profiles.
Building an audience and getting clients takes time, and you’ll have to develop a robust plan to create and post your content.
Remember, behind any piece of content, there’s always a strategy.
Your intention is to get more clients to know you, trust your expertise, and eventually hire your services as a professional translator.
So, what strategy should you implement to achieve this goal?
- Use Canva to use pre-made posts that you can customize and use right away.
- Be sure to post 4 to 5 posts per week.
- Set up automatic posts to save time in the process.
- Adhere to 3 to 5 topics to keep your content consistent (some inspo for you: posts about the culture of the languages your work with, curiosities in the format of ‘Did you know?’ posts, posts on why translation is important, stats, innovations and hot trends in the translation industry).
- Interact, interact, interact! Replying to comments boosts your engagement rate and increases your chances of being recommended by the algorithms.
Join Professional Association Directories
Apart from being active on your social media profiles, being part of professional association directories helps you gain credibility and makes it easier for clients to find you.
Certifications issued by these associations validate your translation skills and attest to a high level of competence in producing faithful and accurate target texts.
The exams to get these certifications are challenging, but, once you’re in, you can put your credentials to work and make money translating.
There are different associations for translators and interpreters; you can find the full list here.
Take into account that you’ll need to meet certain criteria or pass high-level exams to become a full or associate member.
As a certified translator, you’ll be able to raise your rates and demonstrate your outstanding translation skills, which in turn opens doors and helps you work on high-class projects.
Apply For Remote Work On Traditional Job Boards
I get it. You love the comfort of working at home, managing your own schedule, and avoiding telecommuting.
Traditional jobs require you to abandon that type of lifestyle.
But did you know that more and more companies are switching to permanent remote jobs?
Embrace that opportunity and start applying to remote jobs on traditional job boards to get hired and make money translating from home.
My favorite job boards to find remote translation jobs are the following:
So, there you have it! If you were looking to make money translating as a freelancer, now you can have the peace of mind of knowing that it may be hard at first, but you’ll reap the benefits if you’re willing to put in the effort.
Opportunities to succeed as a freelancer translator are everywhere. Adopt a persevering attitude, invest in yourself, and show off your best work to stand out from the crowd.
Who knows? Maybe you end up turning this side hustle into a full-time job. Good luck!

RELATED POSTS:
- Hack: How to Translate Faster to Make More Money From Home
- 45 Killer Business Ideas for Stay At Home Moms No One Talks About
How To Make Money Translating Like A Pro [Epic Guide + Useful Tips]
DON’T FORGET TO PIN AND SHARE THIS POST! ⬇


Leave a Reply