So you want to set up your own website as a virtual assistant, but the whole website-building thing feels too complicated? Don’t worry! You don’t need coding skills or a big budget to look professional online. In this post, I’ll show you step by step how to make a virtual assistant website for free in less than an afternoon so you can start showcasing your services and landing clients faster!
SAVE THIS POST TO READ IT LATER:

DISCLAIMER
This post may contain affiliate links, which means I’ll receive a commission if you purchase through my links, at NO extra cost to you. Read my Disclaimer for more information. Hope you find this post useful!
RELATED POSTS:
- How To Become A Virtual Assistant With No Experience
- How To Get Clients As A Virtual Assistant [I Landed One In My First Week!]
- How To Onboard A New Client As A Pro Virtual Assistant In 6 Easy Steps
How To Make A Virtual Assistant Website For Free
Let’s be honest—having just a LinkedIn profile isn’t enough when you’re trying to grow your VA business.
Sure, it’s great for networking and being searchable, but it doesn’t give you space to actually talk about what you do, how you work, or what kind of clients you help.
That’s where a simple website comes in. Think of it as an extension of your LinkedIn profile, where you can show your personality, add testimonials, explain your process, and make it easy for someone to contact you or book a call.
And no, you don’t need to hire a web designer or spend a cent to get started. Let’s dive in!
BTW, all the docs you need to kickstart your VA journey are included in my free VA Client Acquisition Toolkit! Get instant access to:
– customizable Zoom & Meet backgrounds,
– contract templates (hourly, project, and retainer-based),
– invoice templates, and
– a business proposal template.
It also includes the pitch templates and the resume that got me 2 new clients! Grab the free toolkit below!!
Head Over To Carrd.com
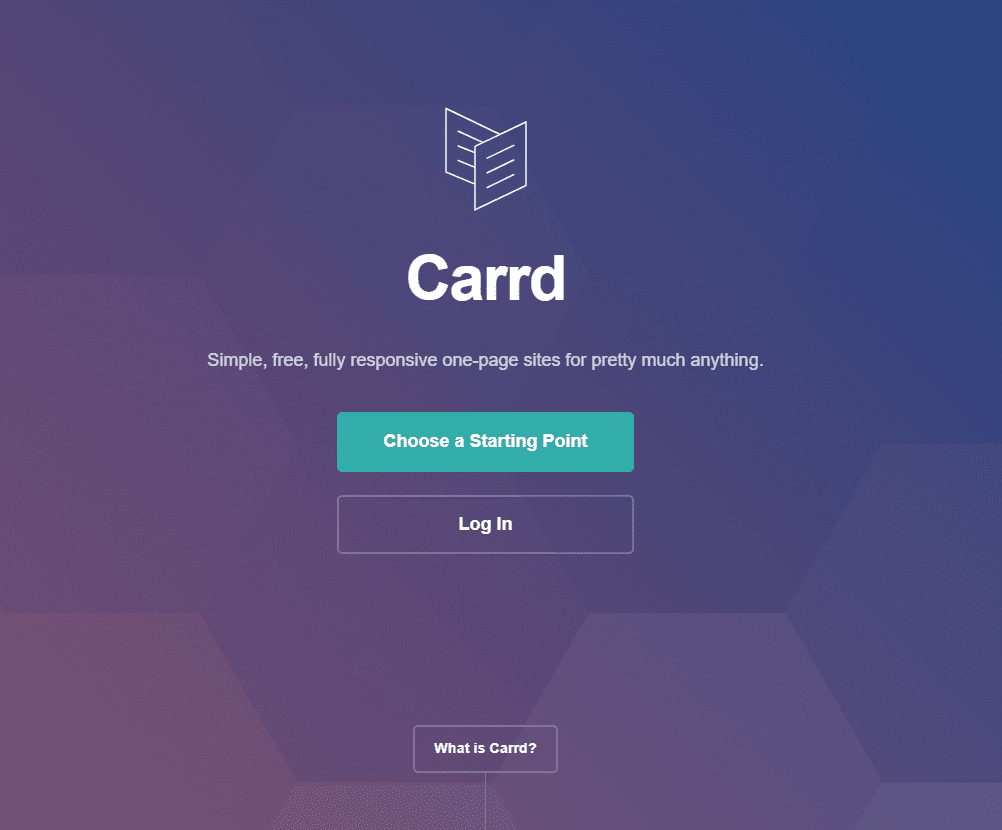
Source: Carrd.com
I love Carrd because it helps you make a professional one-page website in less than an afternoon.
They offer beautiful templates so you don’t have to start from scratch, and the interface is super beginner-friendly, allowing you to just drag and drop elements on your page.
The best part is that you can publish your website for free and, if you want to add your own domain, it costs only $19, PER YEAR!
The first step is then to go to Carrd.com, press the ‘Log In’ button and create your account. Then verify your email.
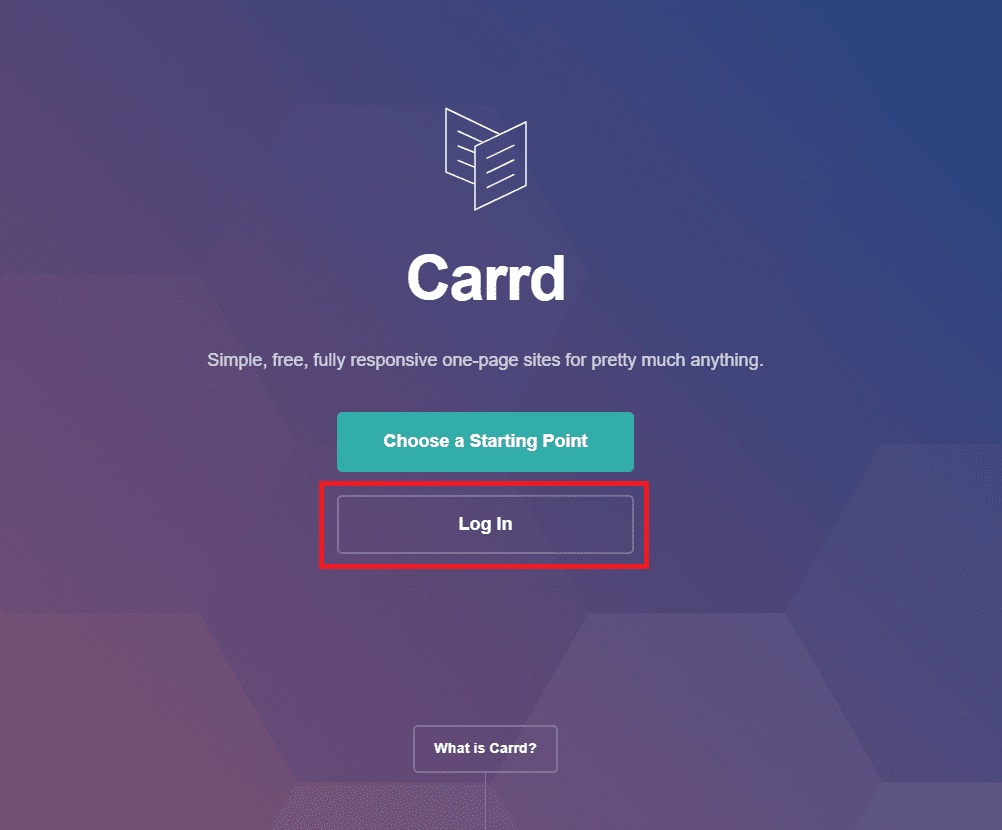
Source: Carrd.com
Choose A Template
After verifying your email, click on the ‘New Site’ button on the upper right side of the screen and select a template to work on.
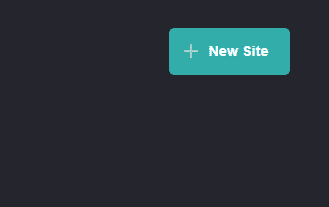
Source: Carrd.com
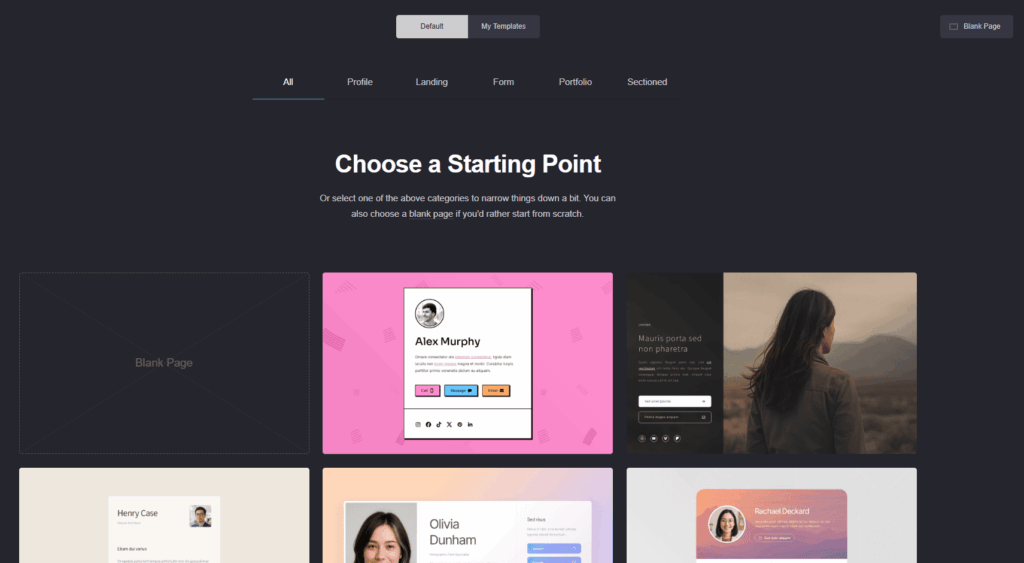
Source: Carrd.com
I’d go with this template:
Source: Carrd.com
Customize Your One-Page Website
Now it’s time to customize our template.
You can customize copy, images, colors, and fonts so they suit your brand.
Let’s change the colors first.
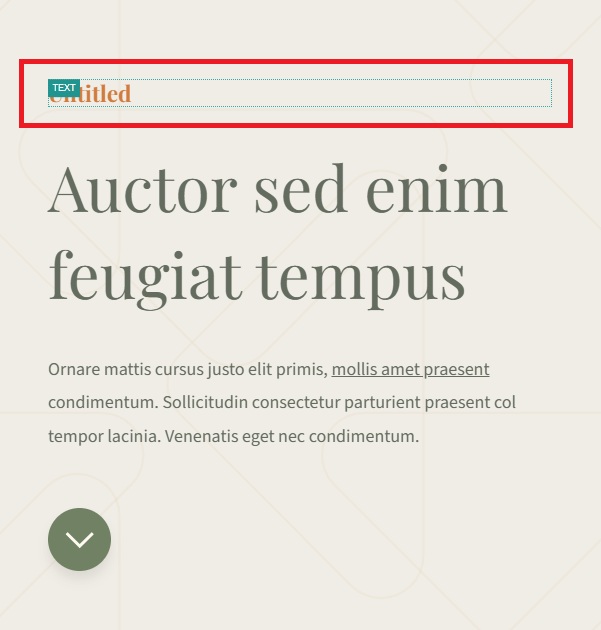
For this website, I want pink and brown to be the main colors, so let’s select the element I want to modify and change the color.
Here, I want to select this text and change the color to pink:
Source: Carrd.com
Then I go to the Appearance settings by clicking on the brush icon:
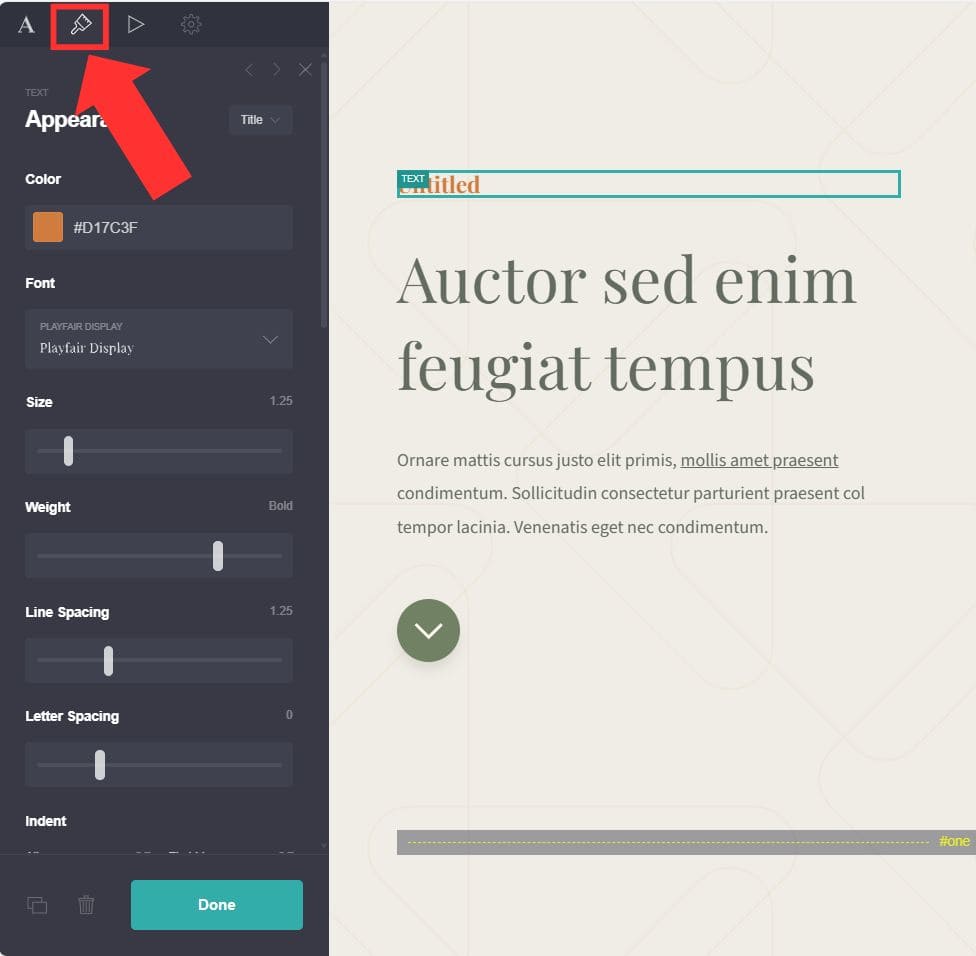
Source: Carrd.com
I change the color and repeat the same process for all the elements I want to modify; the first section would look this way:
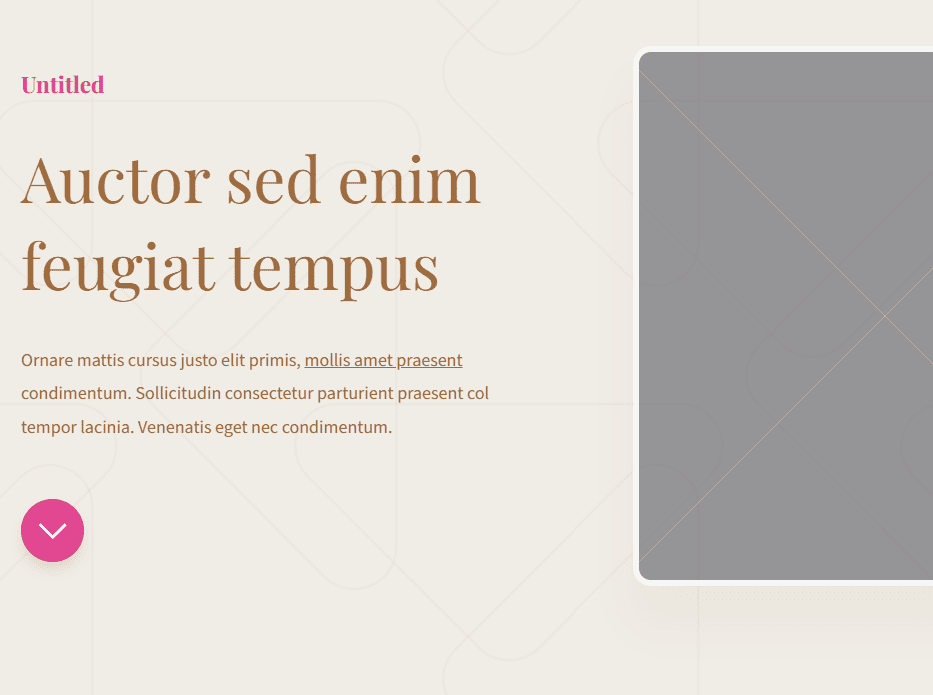
Source: Carrd.com
Now that the colors of all the elements of the site are on point, I’m going to work on the copy.
For this, I’ll be using ChatGPT to help me with the writing!
Use this prompt to make the copy faster:
“I’m a Virtual Assistant who specializes in [include specialization, for example: admin support] for [include ideal clients, for example: small business owners and solo entrepreneurs]. I want to create a simple, one-page website using Carrd. Please give me a full-page layout broken into clear sections, with copy examples for each one.
The sections I want to include are:
Who I help and what I do (Headline + subheadline + short description)
Short intro about me (A warm paragraph, casual tone)
Main services I offer
Contact section (CTA and options to link to email or booking link)”
Whatever the resulting copy, make sure to edit it before inputting it into the site sections.
I had to make some edits here and there to make it mine; avoid copy-pasting!
Now that I’m happy with the copy, I’m going to start replacing dummy text with the real information.
To change the text, select the element and go to the Text settings; then replace the text in the text field:
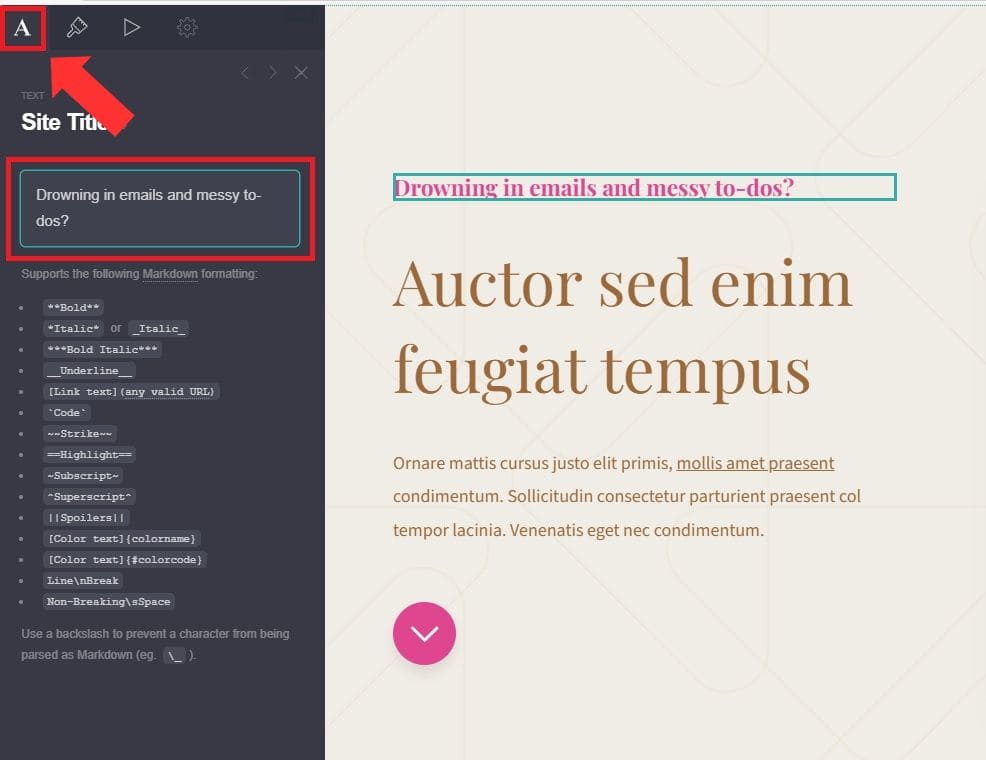
Source: Carrd.com
You can definitely format the text using the markdowns shown on the left side of the screen but I’m going to skip this altogether as I’m happy with how the text looks right now.
This is how the first section of the site looks with all the text changes:
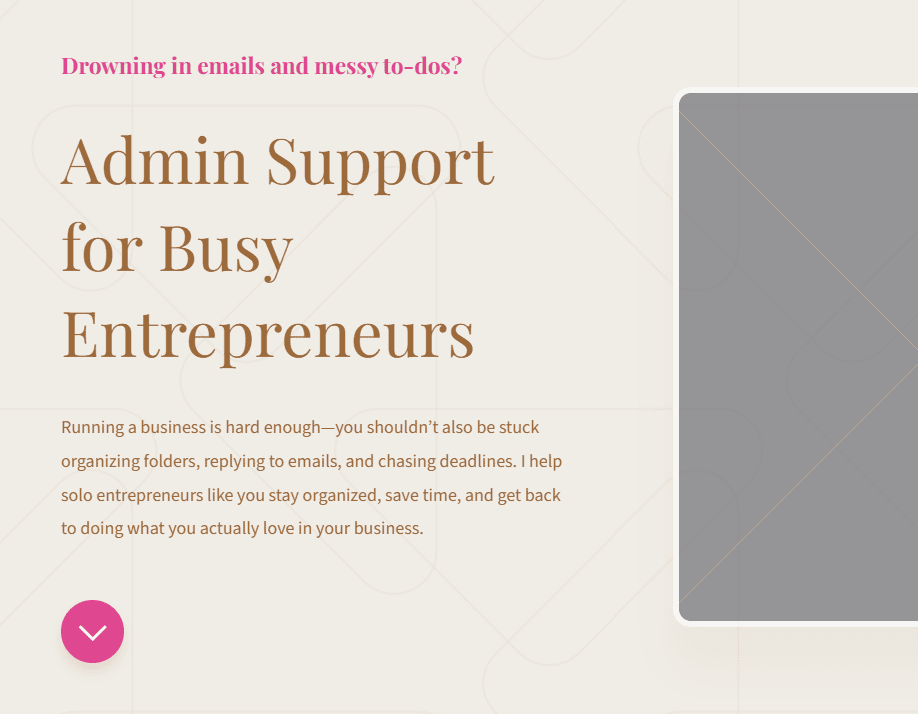
Source: Carrd.com
Here’s how the ‘Short intro about me’ section looks after inputting the copy:
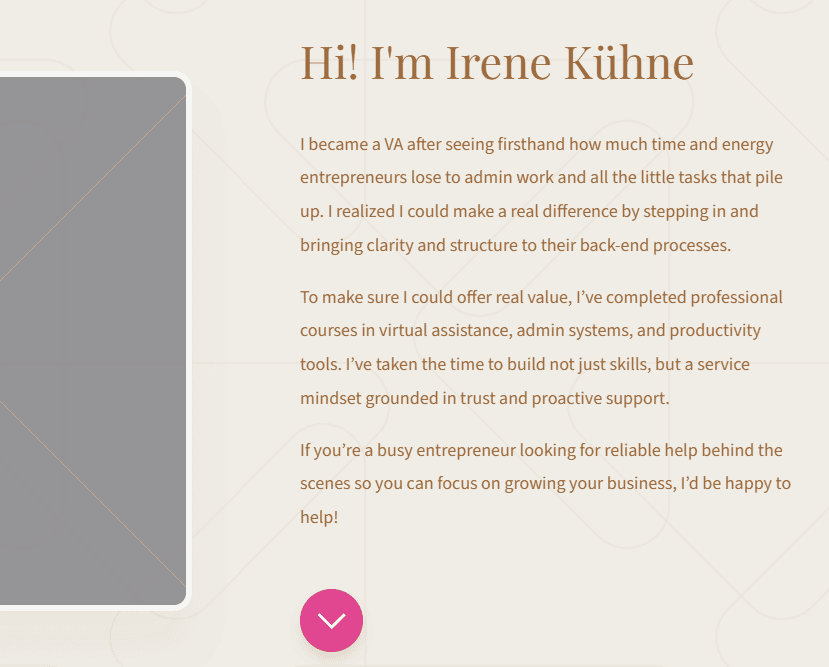
Source: Carrd.com
And the section with the list of services I offer:
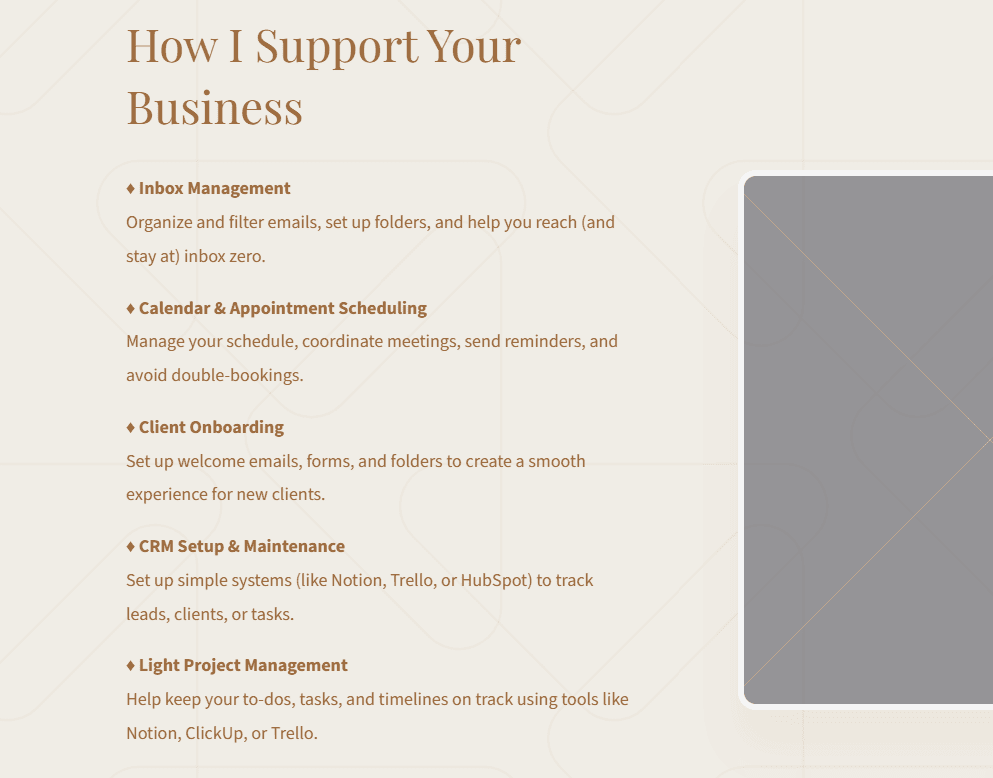
Source: Carrd.com
Include A Strong CTA
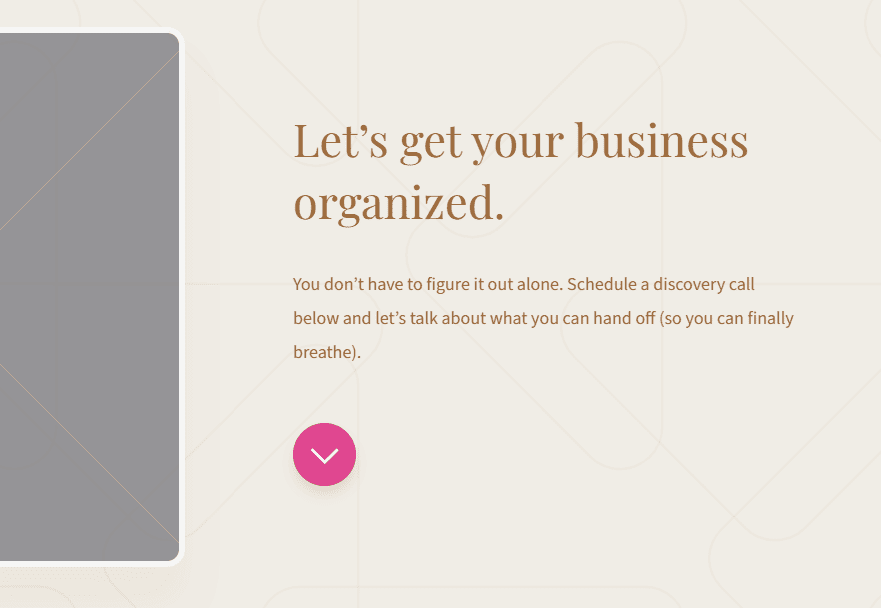
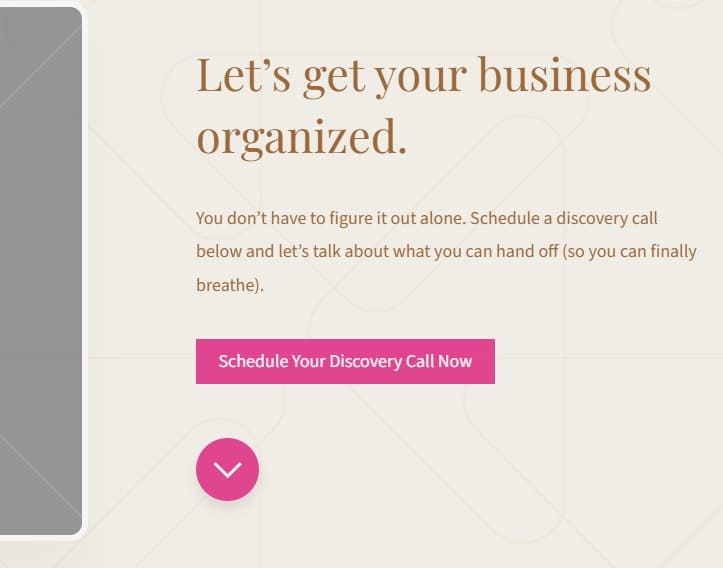
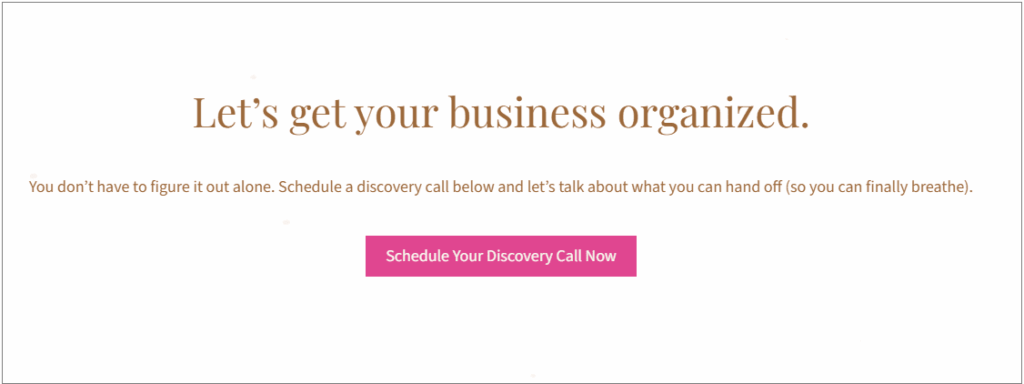
Lastly, here’s how the CTA section looks:
Source: Carrd.com
In the CTA section, I should include a button so clients can schedule a call with me. It’s very easy; here’s how to do it:
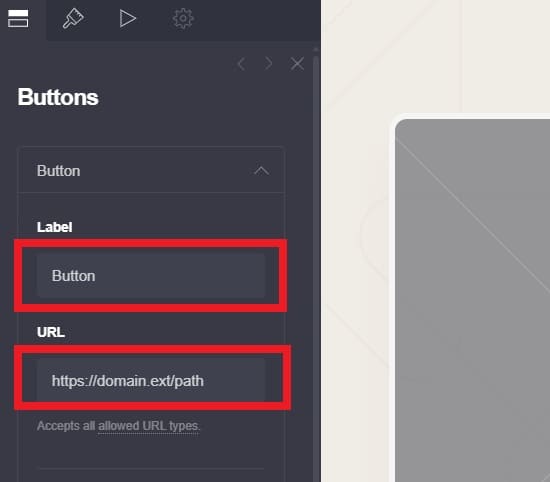
First, click on the Plus button on the right side of the screen and select ‘Buttons’.

Source: Carrd.com
Then click on the drop-down menu and change the label and the URL of the button:
Source: Carrd.com
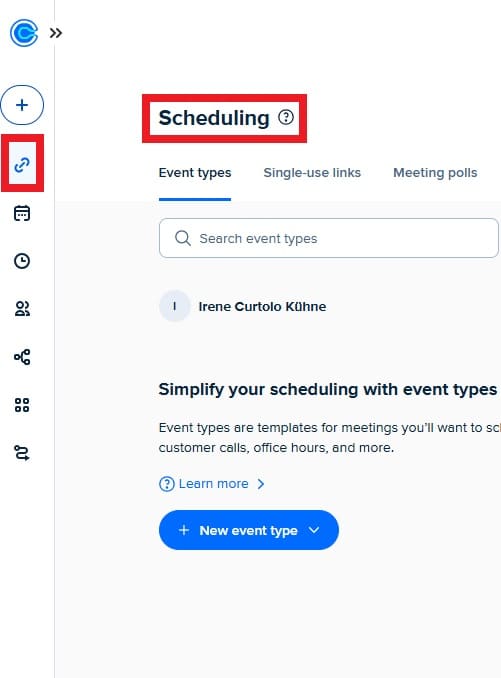
To obtain the Calendly URL, just sign up in Calendly, set your availability and the tool you want to use for calls, and create your first event to share the calendar:
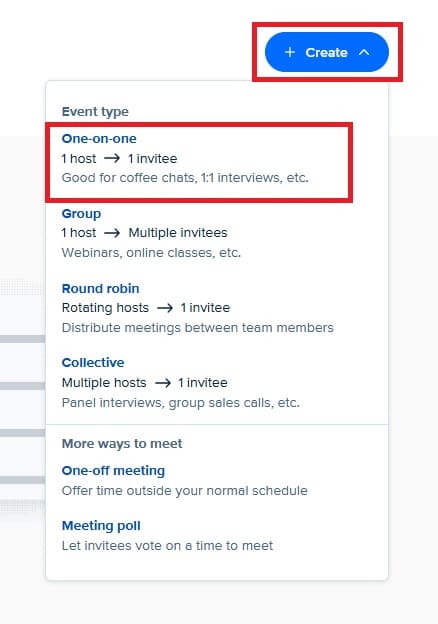
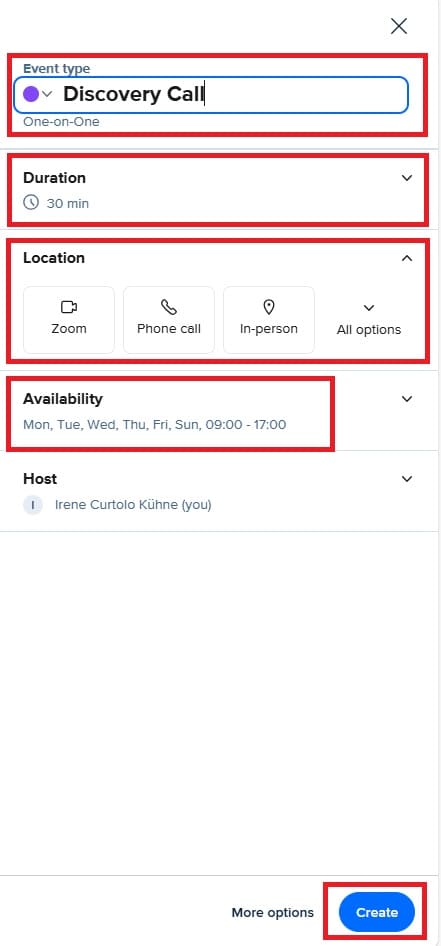
First go to the URL icon (Scheduling settings) on the left side of the Calendly site and then click on ‘+ Create’ on the right side and ‘One-on-one’ for the event type.
Source: Calendly.com
Source: Calendly.com
Then name the event and set up the duration, the location, your availability and hit ‘Create’:
Source: Calendly.com
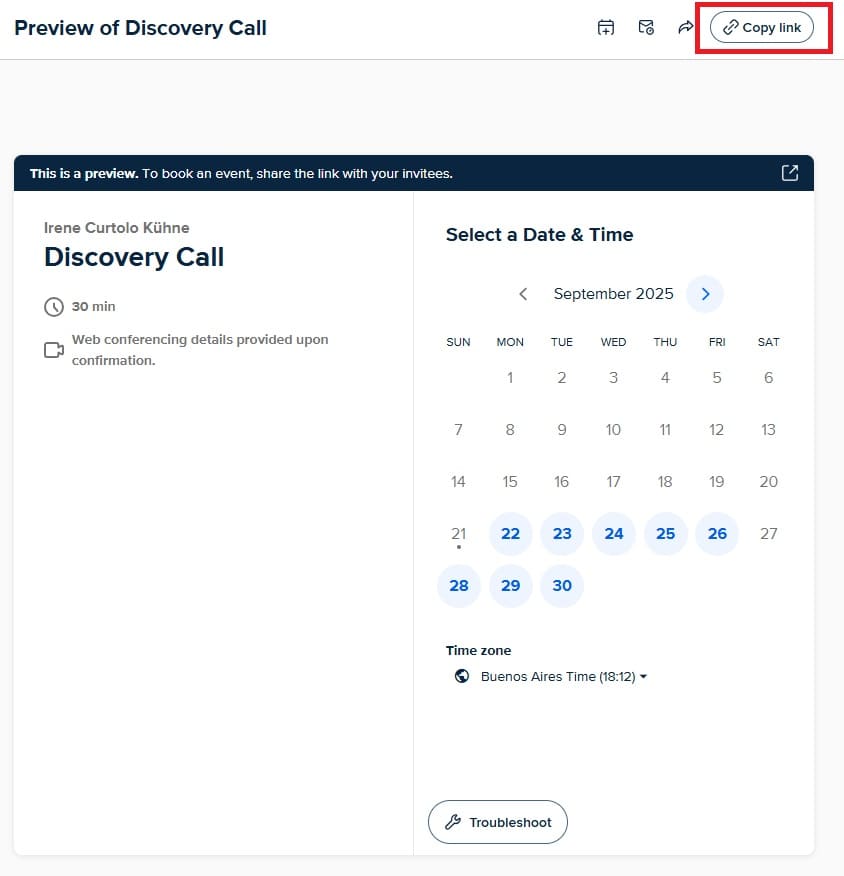
Finally, copy the link to include it in your Carrd site:
Source: Calendly.com
The button with the Calendly link would look as follows:
Source: Carrd.com
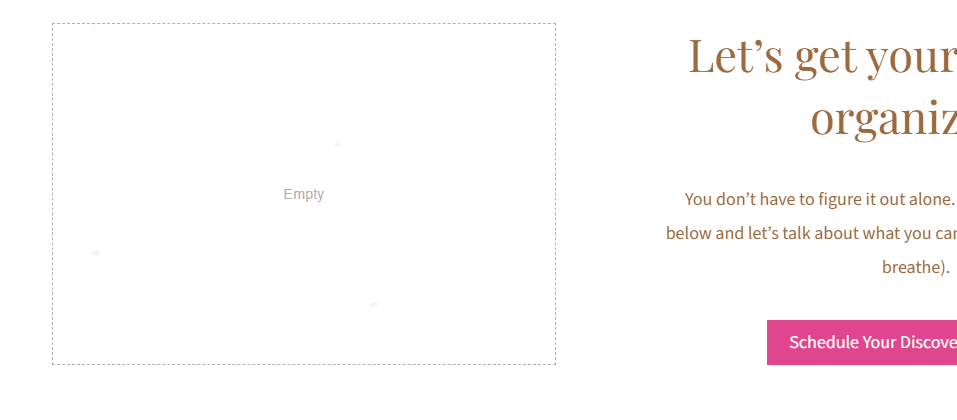
I don’t want this section to have an image so as to avoid distraction.
To remove it, I simply select it and press ‘Delete’.
Now that there is no image, I have two columns but I need only one, so I’m going to delete the left column.
Here’s how it looks with two columns and the deleted image:
Source: Carrd.com
To delete the column, first select the container and then go to the Container settings and from the drop-down menu select ‘Default’:
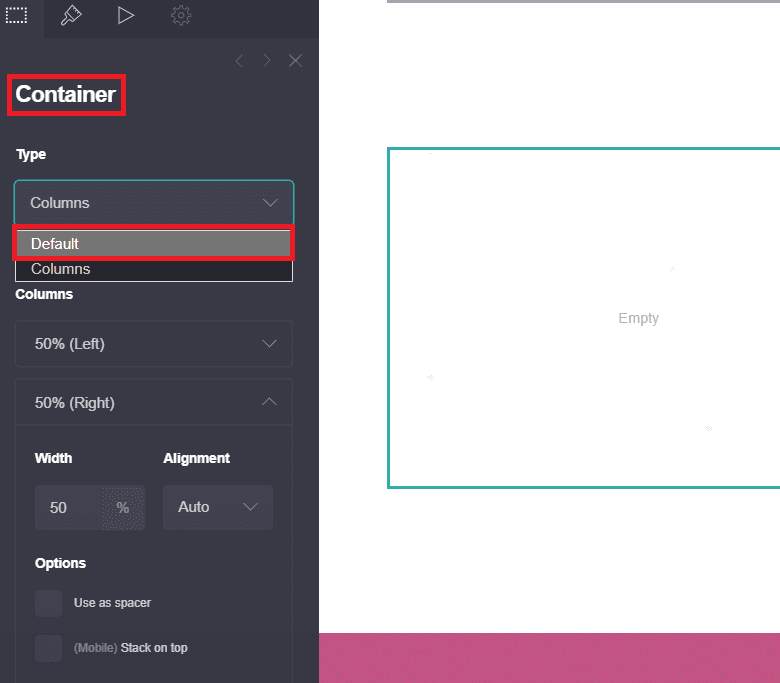
Source: Carrd.com
Now we have a standalone CTA section!:
Source: Carrd.com
BTW, all the docs you need to onboard your client are included in my free VA Client Acquisition Toolkit! Get instant access to:
– customizable Zoom & Meet backgrounds,
– contract templates (hourly, project, and retainer-based),
– invoice templates, and
– a business proposal template.
It also includes the pitch templates and the resume that got me 2 new clients! Grab the free toolkit below!!
Add Images That Suit Your Brand
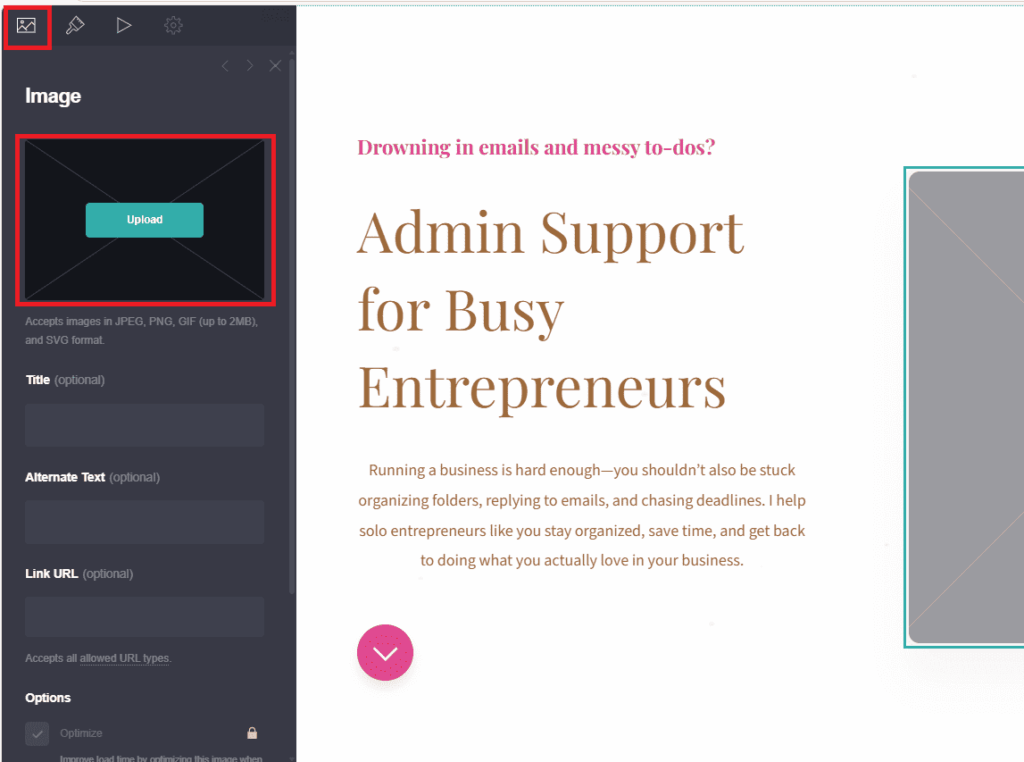
Adding images is very simple, just go to the boilerplate image containers and in the Image settings, press ‘Upload’ and upload your image.
Source: Carrd.com
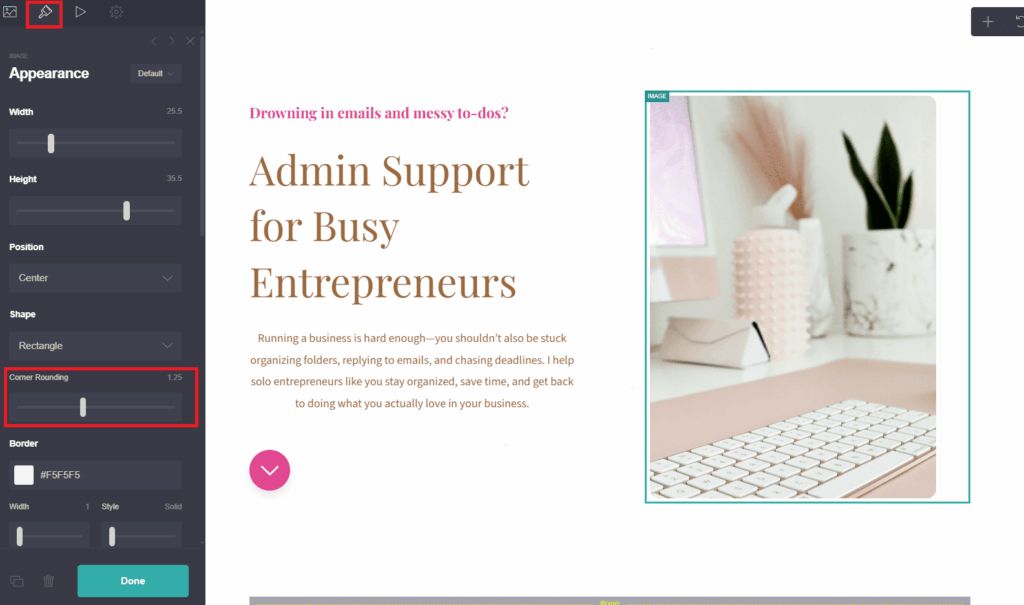
You can play with the height, width, position, etc. in the Appearance section if you want. I just added rounded corners:
Source: Carrd.com
Don’t Forget Your Social Media Links
To add your socials, select the Icons container, go to the Icons settings and click on each social platform to add your URL.
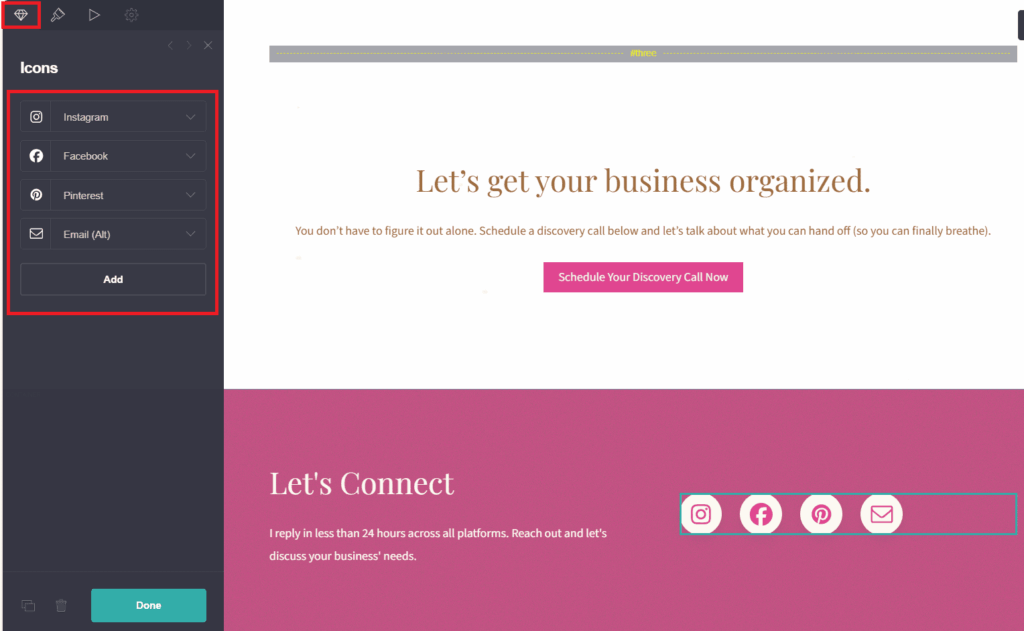
Source: Carrd.com
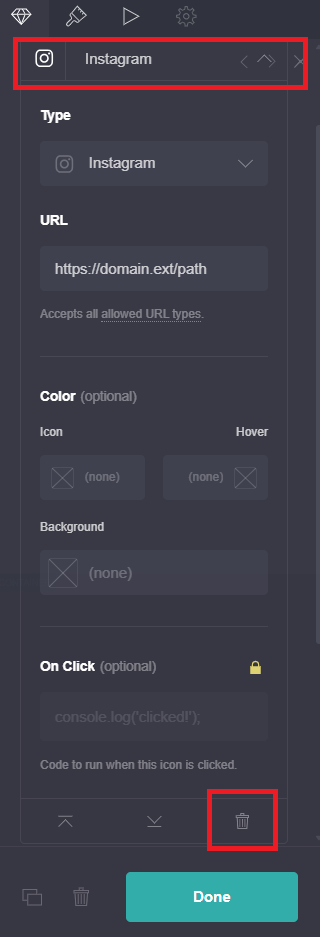
You can also delete an icon by pressing the Trash button:
Source: Carrd.com
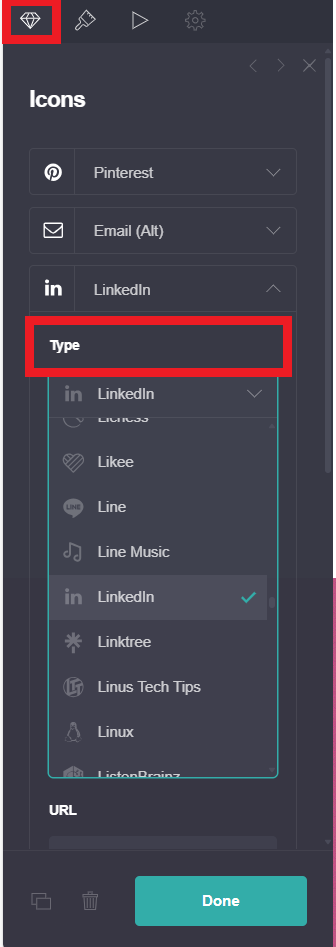
I notice that here there is no LinkedIn icon, so let’s add it.
Go to the Icons settings and press Add; then in the Type drop-down menu, select LinkedIn (in the Brands section).
You can change the symbol of the icon using the drop-down menu too.
Source: Carrd.com
This is how my social media section looks like now:

Source: Carrd.com
Our site is ready. Now you have a responsive and free virtual assistant website to put out to the world!
Optional: Connect A Custom Domain
The point of this post is to help you make a free virtual assistant website: Carrd.com lets you publish your site for free, though with their branding.
If you want to remove their branding and use a custom URL, then you can do it for just $19 PER YEAR.
Again, this is totally optional, but if you are comfortable with it, you can purchase the Pro Standard plan and use a custom domain.
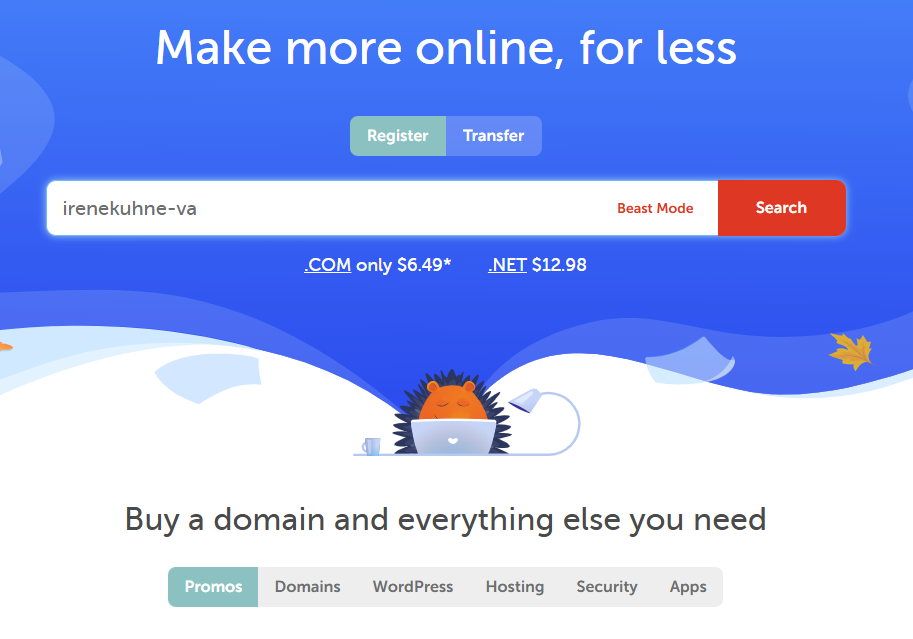
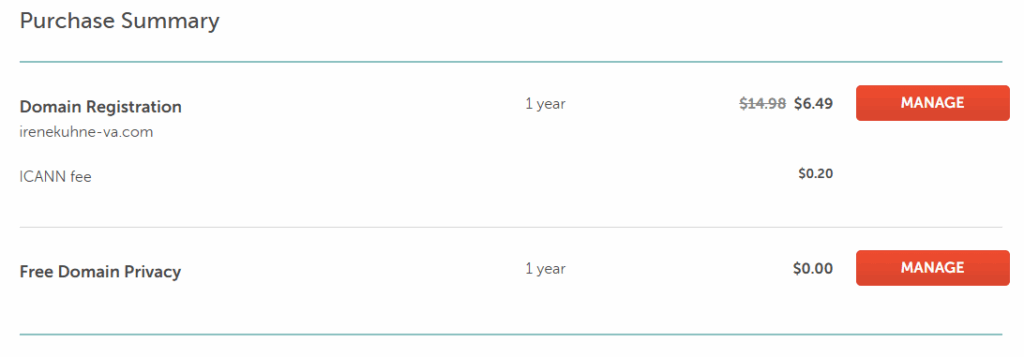
First, choose a custom domain on Namecheap.com. I will go for irenekuhne-va.com; it’s available, so I’ll buy it!
Custom domains are cheap; they generally cost less than $20/year.
Besides, always check for discount codes for new users; in this case, there is one next to the domain name which allows me to buy the domain for $6 instead of $11:
Source: Namecheap

Source: Namecheap
After purchasing the domain, in the Thank You page, go to Purchase Summary → Domain Registration, and click ‘Manage‘.
Source: Namecheap
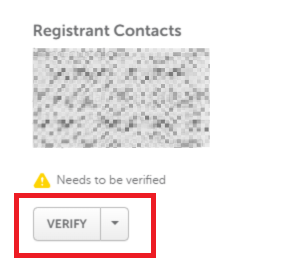
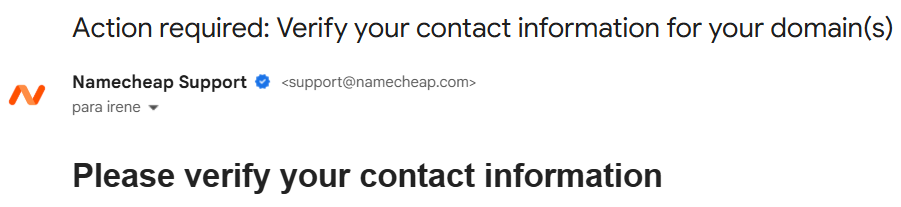
Next, in the Domain List page, go to the bottom of the page and click ‘Verify’ to verify that you have purchased the domain. A verification message will be sent to your email.
Source: Namecheap
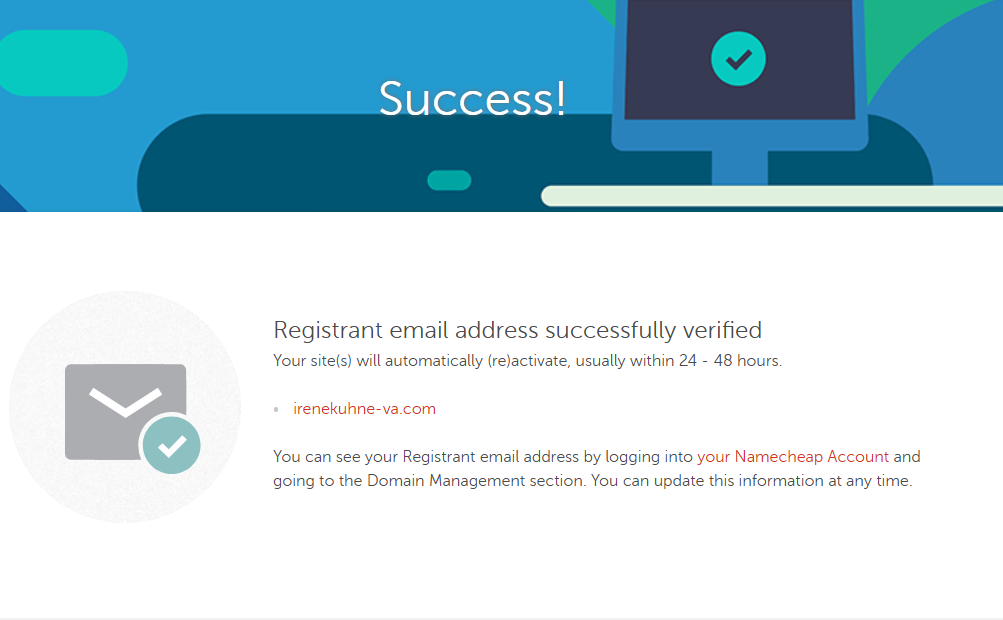
Verify your contact information through the verification link. This is the Success page you get after verifying the data:
Source: Namecheap
Now, it’s time to connect your new custom domain to the Carrd site. It’s pretty easy.
In your Carrd site, click on the Save icon in the upper right corner of the screen:
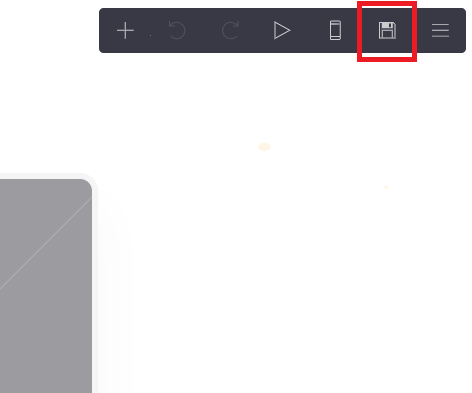
Source: Carrd
Then go to ‘Publish to a custom domain’, enter your domain in the provided field, and then publish changes.
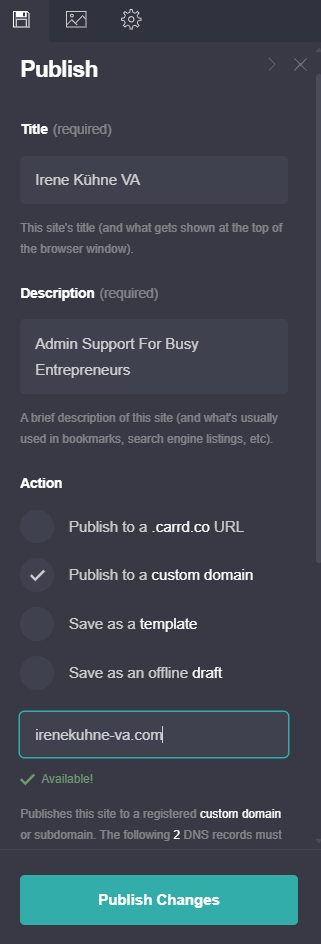
Source: Carrd
Lastly, we have to add the 2 DNS records to the domain in Namecheap.
These are the 2 DNS records provided by Carrd:
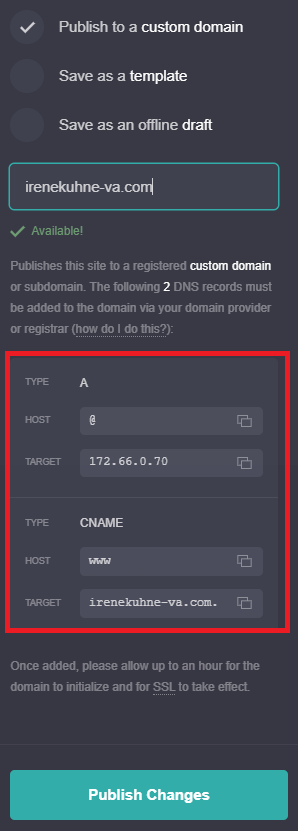
Source: Carrd
In Namecheap, go to Domain List → Advanced DNS → remove URL Redirect records and CNAME records, if any. Here, there are CNAME and URL Redirect records, so I’m going to delete them:
Source: Namecheap
Now, I’m going to add the new records. Go to Domain List → Advanced DNS → Add New Record
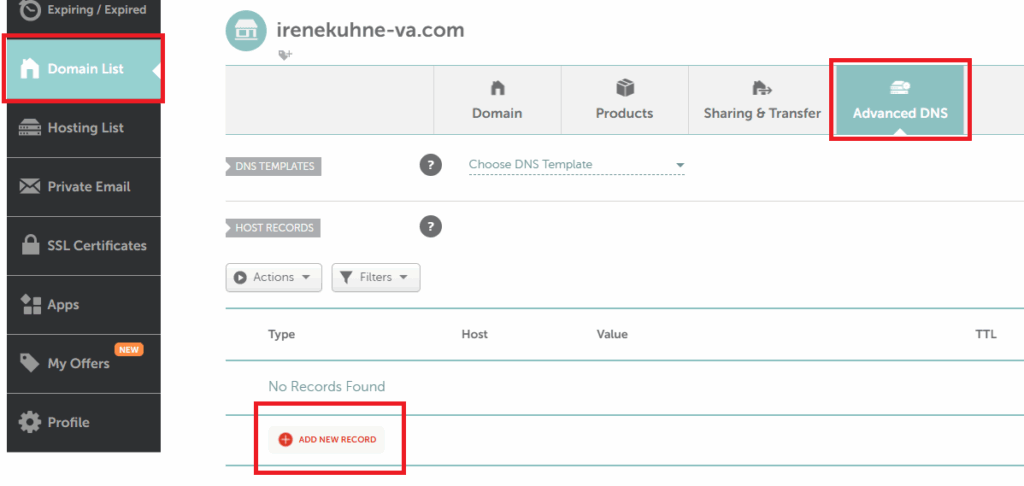
Source: Namecheap
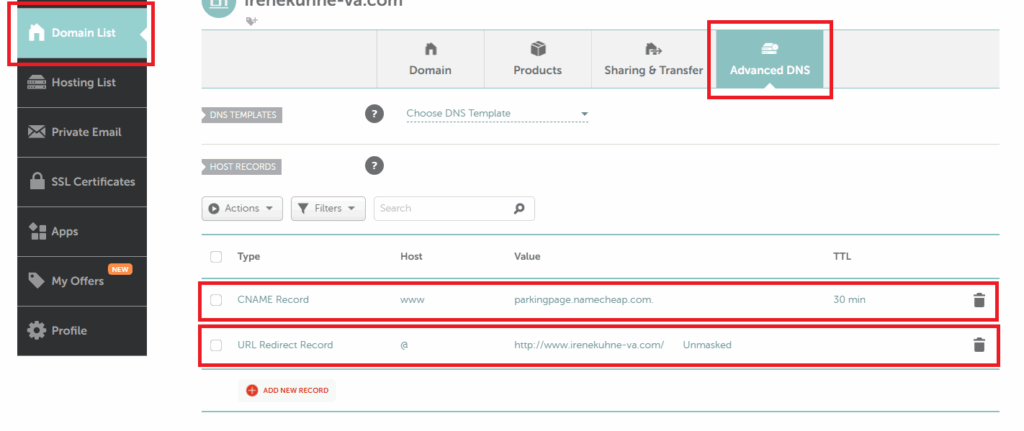
The first record is type: A, host: @, target/IP Address: 172.66.0.70. So I’m going to select the type from the drop-down menu and copy paste the rest of the data in the corresponding fields. Then save changes by pressing the green check mark.
Same for the second record provided by Carrd: type: CNAME, host: www, target/IP Address: irenekuhne-va.com.
My DNS records are now correctly added:
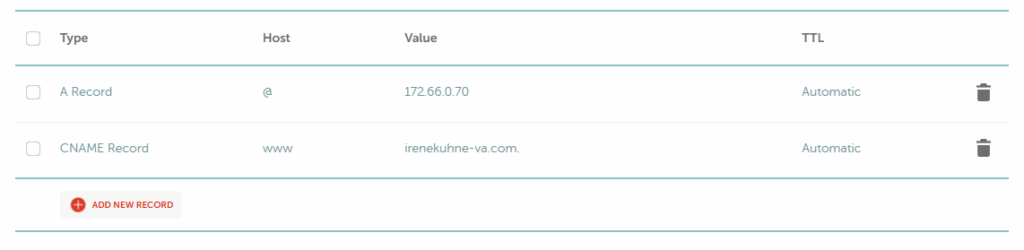
Source: Namecheap
Back at Carrd, make sure to hit ‘Publish changes’.
That would be it! Now you have to wait until the site ‘initializes’, which takes up to an hour or less.
After an hour, you’ll be able to access your site with the custom domain.
Want to also add a custom email? I explain the process step by step here.
Does this still feel too complicated? Just send me a message at hello@bizandbliss.com and I’ll set up your professional website and email for a small fee!
Wrapping Up: How To Make A Virtual Assistant Website For Free
So there you have it! This post was all about how to make a virtual assistant website for free.
As you could see, you don’t need to be a tech wizard, and you definitely don’t need to spend hundreds on web design.
Start simple and build as you grow.
Now head over to Carrd and design your one-page website right away!
DON’T FORGET TO PIN THIS POST!


Leave a Reply