So you got hired, but the idea of onboarding the client makes you feel nauseous? Don’t worry! We all have experienced the fear of messing up when working with a client for the first time; that’s why I created this simple guide on how to onboard a new client as a virtual assistant. Follow these easy steps and kick off work the right way!
PIN THIS POST TO READ IT LATER:
DISCLAIMER
This post may contain affiliate links, which means I’ll receive a commission if you purchase through my links, at NO extra cost to you. Read my Disclaimer for more information. Hope you find this post useful!
RELATED POSTS:
- How To Become A Virtual Assistant With No Experience (+ FREE Client Acquisition Toolkit!)
- How To Get Clients As A Virtual Assistant [I Landed One In My First Week!]
- How To Make A Virtual Assistant Website For Free (Even If You’re Not Tech-Savvy)
How To Onboard A New Client As A Pro Virtual Assistant In 6 Easy Steps
So you’ve already done the hardest part: finding and communicating for the first time with your potential client. Exciting, eh? But now you’re staring at your laptop screen wondering, ‘So now what?‘
Don’t worry, you’re not alone.
When you’re just getting started, onboarding a client can feel totally overwhelming. You want to make a great impression, but without a clear process, it’s easy to feel lost.
That’s exactly why I created this step-by-step guide on how to onboard a new client as a virtual assistant. It’s the exact process I follow to work with my clients.
This guide will show you what to do from the moment your client shows interest in working with you, so you can kick things off with confidence.
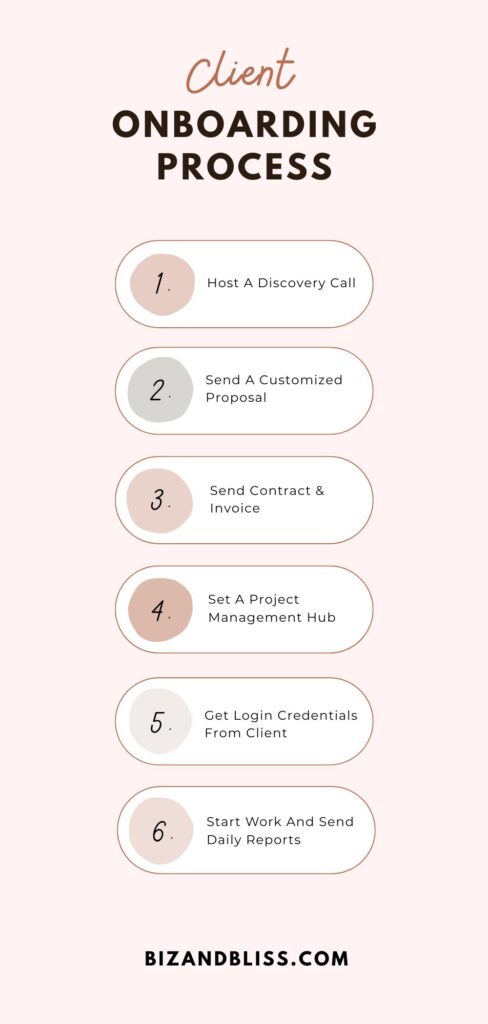
The onboarding process looks like this:
- Host A Discovery Call
- Send A Customized Proposal
- Send Contract & Invoice
- Set A Project Management Hub
- Get Login Credentials And Key Info From Client
- Start Work And Send Daily Reports
BTW, all the docs you need to onboard your client are included in my free VA Client Acquisition Toolkit! Get instant access to:
– customizable Zoom & Meet backgrounds,
– contract templates (hourly, project, and retainer-based),
– invoice templates, and
– a business proposal template.
It also includes the pitch templates and the resume that got me 2 new clients! Grab the free toolkit below!!
Now, without further ado, let’s get into the steps of the onboarding process.
Host A Discovery Call

Think of your discovery call as a job interview, but for both of you.
Just like when you’re applying for a job, you want to show up prepared and present yourself professionally.
But here’s the difference: you’re also evaluating them to see if they’re a good fit for you.
This is your chance to:
- Understand what they really need help with
- Set expectations early on
- Spot red flags before committing
What To Do Before The Call
I got my two current clients through a freelance platform, so we scheduled a call through the chat of the platform, but, if you want, you can use scheduling tools like Calendly so that the client can pick an available time from your calendar. It’s free!
Apart from scheduling your meeting, prepare for the call by researching the client beforehand if information about them is available.
Check their socials and website to know what they do and to ask better questions during the call.

What To Cover During The Call
During the call, you want to know if the client is a good fit for you.
Basically, you want to make sure:
- The client is willing to pay you what you want.
- You can do the job (the tasks are in line with your skills).
- The client is willing to adapt to your work format (by the hour, by project, by retainer)
During these calls, I make it clear that I want to work based on results, rather than by the hour. This gives me the freedom to work whenever I feel like it but delivering the outcome the client wants.
You can work in whatever format you like – my tip here is that you have to be very clear about this so to avoid problems later.
And most importantly, the client should be open to paying your rate, without discounts or offering a ridiculously low remuneration for your work.
Additionally, if the tasks do not coincide with the initial project description or I can’t just do them because I don’t have the required skills, this is enough for me to decline the client’s collaboration.
You have to be sure that you can do the job or at least learn fast to avoid disappointing the client and ending the work relationship due to your incompetence 😬.
A potential client once told me during a discovery call: ‘You’ll have to do everything in the Marketing department. I will give you no directions. You’ll have to do it all by yourself’.
I beg your pardon???
THIS WAS A HUGE RED FLAG!! 🚩🚩
The client should ALWAYS be clear about the tasks you have to complete and be willing to guide you. You can’t read minds!
Here are good questions to ask during the call:
- What are your main goals? What tasks do you need support with?
- What tool do you already use for project management and communication?
- Do you have a budget range in mind?
- Are you looking for ongoing support or a one-off project? How long will our collaboration last?
- What would a typical day look like during our collaboration?
Take down notes when they reply to your questions. You will use these notes for your proposal!
How To End the Call
If the call goes well, you can say something like:
“Thanks for sharing everything with me! I’ll send over a proposal shortly that recaps what we discussed and outlines the next steps.”
If the call doesn’t feel right, you can politely wrap up and say something like:
“Thanks for your time! I’ll review everything we discussed, and if I believe it’s a good fit, I’ll follow up with a proposal.”
Send A Customized Proposal

After the discovery call, it’s time to put everything you discussed into a clear proposal. This is where you officially outline what you’re offering, how you’ll help, and how much it will cost.
Here’s what your proposal should include:
- A short “About Me” intro: Briefly explain who you are and what you bring to the table.
- Tailored list of services: Break down exactly how you can help based on their pain points.
- Pricing options: Offer one or more pricing structures (retainer, hourly, or project-based).
- Next steps: Tell them how to move forward; this would be for example signing the contract, paying the invoice, and sharing their credentials to access the accounts you’ll be working with.
Don’t wait too long to send your proposal. I always prepare the proposal immediately after our call and send it to them to keep the momentum going.
Send Contract & Invoice
Preparing, Signing, And Sending The Contract
I always send the contract first and only move forward with the invoice once it’s signed.
This is because the contract makes sure the client agrees to everything: your services, deadlines, communication boundaries, and payment terms, before any work begins.
Your contract should never be one-size-fits-all. I personally customize every contract based on the client’s needs and the exact scope we discussed.

These are the clauses that you should include:
- Scope of Services – A clear outline of what you’ll do (and what you won’t)
- Payment Terms – how much are you going to be paid and when? For example, I require full payment upfront, which would be $1,200 at the beginning of the month for my both clients.
- Availability & Communication – My working hours and how we stay in touch
- Confidentiality Clause – To protect client data and login credentials
- Revisions & Feedback – What’s included, and when additional time may be billed
- Intellectual Property – Final deliverables belong to the client after full payment
- Termination Policy – How either of us can end the contract, and what happens if payments are late
You can use tools like SignWell to sign the contract. Then, you can send it via email or WhatsApp.
Preparing And Sending The Invoice
Once the contract is signed, I send an invoice through email or WhatsApp. I include:
- Number of invoice, date, due date
- ‘Bill To’ section with client’s business name, address, email, and phone number
- ‘Pay To’ section with my info: name, address, email, and phone number
- Itemized list of services
- Price per service/ hours that will be worked and total due
- Bank details for direct payment

Remember that all the docs you need to onboard your client are included in my free VA Client Acquisition Toolkit! Get instant access to:
– customizable Zoom & Meet backgrounds,
– contract templates (hourly, project, and retainer-based),
– invoice templates,
– a business proposal template,
– pitch templates, and
– VA resume template.
Grab the free toolkit below!!
Set A Project Management Hub
So the client already signed the contract and paid the invoice – wohoooo!!
Now it’s time to set up a project management hub to keep track of the tasks assigned.
Generally, the client already works with a project management tool, but if they don’t have one set up, you can recommend the following ones:
- Trello
- Asana
- Click-up
Using a shared project management tool allows your client to easily check the status of tasks and upcoming deadlines, share login credentials or important files, and leave comments on ongoing work, without the annoying back-and-forth email threads.
I also highly recommend that you have a personal VA planner to organize your whole VA business journey; this one is a lifesaver and helps me stay sane LOL!
Get Login Credentials And Key Info From Client
Now that your shared project space is set up, it’s time to make sure you have access to everything you need to start working efficiently.
That means collecting login credentials, brand assets, and any essential documentation the client needs to share.
Depending on the services you’re offering, here are some examples of tools your client might need to share access to:
🔸 For Admin Support:
- Gmail or Outlook (email inbox)
- Google Calendar or Calendly
- Google Drive, Dropbox, or OneDrive
- Zoom or Microsoft Teams
🔸 For Social Media Support:
- Instagram, Facebook, LinkedIn, TikTok, Pinterest
- Meta Business Suite
- Canva
- Later, Buffer, or Hootsuite

🔸 For Content Creation or Blogging:
- WordPress, Wix, or Squarespace
- Notion, Google Docs
- Grammarly or Hemingway
- SEO tools (like Ubersuggest, SurferSEO)
🔸 For E-commerce / Newsletters:
- CRM tools like HubSpot or Salesforce
- Shopify, WooCommerce, Etsy
- ConvertKit, Mailchimp, Flodesk
- Stripe or PayPal (for order tracking)
To store login credentials, you can use tools like LastPass or 1Password, but, if they prefer not to use a tool, have them send a document in your shared Google Drive folder set with restricted access.
Apart from that, make them share with you the brand’s assets and any essential documentation that you need to start working. You can create a shared folder in Google Drive and have them upload everything there.
Start Work And Send Periodic Reports

So…
The moment of truth has come! It’s time for you to kick off work!
The first thing I do during this stage is confirm the project start date and the first tasks I’ll be working on.
Then, I explain how my workflow will look: I let them know how often I’ll send updates (for example, I like to send daily updates), how they can reach me if needed, and what to expect in terms of task delivery and communication.
Even something as simple as “I’ll send you updates every Friday, and I’ll reach out via Slack if anything urgent comes up” is enough for the client to have peace of mind.
During your first week, focus on delivering tasks on time, asking smart follow-up questions, and keeping everything organized in your shared project space.
And don’t forget to schedule a short check-in after the first one or two weeks; my clients actually like to do a short call every 15 days to ask how everything’s going, see if anything can be improved, and what they’d like to focus on next.
These little steps are crucial for a long-term working relationship with your client.
Wrapping Up: How To Onboard A New Client As A Pro Virtual Assistant
So there you have it! This post was all about how to onboard a new client as a virtual assistant.
Now you have the exact steps to understand what your client needs and start working with them with clarity and professionalism.
You’ve got this.

DON’T FORGET TO PIN THIS POST!


Leave a Reply